In 1893, Chicago was glowing with pride. The World’s Columbian Exposition, also known as the White City, showcased the power of progress and invention. Millions came from around the world to see electric lights, grand buildings, and human achievement on full display.
But only a few miles away, another man was busy building something very different – a hotel that would become one of the darkest places in American history.
Dr. H. H. Holmes: The Man Behind the Mask
His real name was Herman Webster Mudgett, but he preferred to call himself Dr. Henry Howard Holmes. Educated, handsome, and soft-spoken, Holmes had a gift for making people trust him. He called himself a doctor, a businessman, and an inventor. In truth, he was a master manipulator — and a cold-blooded killer.
He began constructing a massive three-story building in Chicago’s Englewood neighbourhood. Locals thought it would be a luxury hotel for visitors to the World’s Fair. But the workers who built it noticed something odd…
Dr. H.H. Holmes
Inside the “Murder Castle”
H.H. Holmes Castle
The castle was a maze of strange, horrifying designs, including windowless rooms, hallways that led to dead ends, and hidden chutes that dropped straight to the basement, secret gas pipes in the walls, and a giant furnace below.
No single worker ever saw the entire blueprint- Holmes kept firing and rehiring construction crews to protect his secret.
Inside that building, he created a house of traps designed not for comfort… but for killing.
The Horrors Within
During the World’s Fair, Holmes rented rooms to travelers, young women, and newlyweds visiting Chicago. Many checked in with excitement — and were never seen again.
Holmes would lure victims with promises of jobs or love, only to seal their fate within the walls of his “Castle.” Some rooms could be filled with gas at the turn of a knob. Others had soundproof padding so no one could hear the screams.
In the basement, he had acid vats, surgical tables, and a cremation furnace. The bodies were destroyed, and sometimes, the skeletons were sold to medical schools for profit.
Holmes had turned murder… into a business.
The Investigation That Exposed a Monster
For years, Holmes kept escaping suspicion. He changed names, moved cities, and left behind unpaid bills and missing people.
But in 1894, his luck ran out. Detective Frank Geyer began investigating the disappearance of three children Holmes had been traveling with. Following a trail of rented apartments and buried evidence, Geyer uncovered the horrifying truth — the children had been killed and buried in a basement in Toronto.
Soon after, police searched Holmes’ Chicago “hotel.” What they found defied belief — bones, charred remains, and evidence of dozens of missing victims.
The Devil Meets Justice
Holmes was arrested and eventually confessed to 27 murders, though experts believe he may have killed more than 200 people.
When asked why he did it, Holmes chillingly said:
“I was born with the Devil in me.”
He was hanged in 1896. But even in death, his legend refused to die. It took him nearly 20 minutes to die on the gallows — a slow, strangled death for a man who had caused so much suffering.
The Aftermath and Legacy
After his execution, strange things began to happen. People connected to his case died mysteriously. And the building itself – the Murder Castle- burned to the ground a year later under mysterious circumstances.
Some say Chicago wanted to erase it. Others say something darker didn’t want to stay buried.
What Made H. H. Holmes Different?
Holmes wasn’t just a killer. He was one of the first to use psychological manipulation, architecture, and charm as tools of murder. He preyed on the hope and curiosity of a new age — when science was rising, and trust came easily.
His story reminds us that evil doesn’t always look monstrous. Sometimes, it looks polite. Intelligent. Helpful. And that’s what makes it so terrifying.
Before the legend: painted as Amazon in 1861, later renamed Mary Celeste in 1869.
A ship with sails full… and nobody there
Built in 1861 and renamed in 1869, the Mary Celeste sailed from New York on November 7, 1872. Weeks later, on December 4, 1872, another ship found her drifting near the Azores—strong hull, food stocked, no people. Early on December 5, the boarding party saw neat cabins, a tidy galley, a child’s slate on a bunk… and a missing lifeboat.
No fight. No blood. No storm wreckage. Just a quiet ship and a big question.
Meet the people at the heart of it
Captain Benjamin Briggs
Sarah Briggs (Wife of Benjamin)
Sophia Briggs (Daughter of Benjamin)
Albert Richardson
Mary Celeste engraving
What likely happened?
The ship was carrying 1,701 barrels of industrial alcohol. Even if a few barrels leaked, the fumes could scare any smart captain. So what was the safest move? The captain might have decided to keep everyone in the lifeboat for a short time, tied behind the ship. Then fate slips the knot: a gust, a snap, the line parts and the lifeboat drifts away while the Mary Celeste keeps sailing, calm as a house with the door left open.
Why this story grips us
Because everything looks normal: clean pots, folded clothes, a child’s chalk sum left half-finished. It feels human, not haunted. One careful choice + one stroke of bad luck = a mystery that won’t let go.
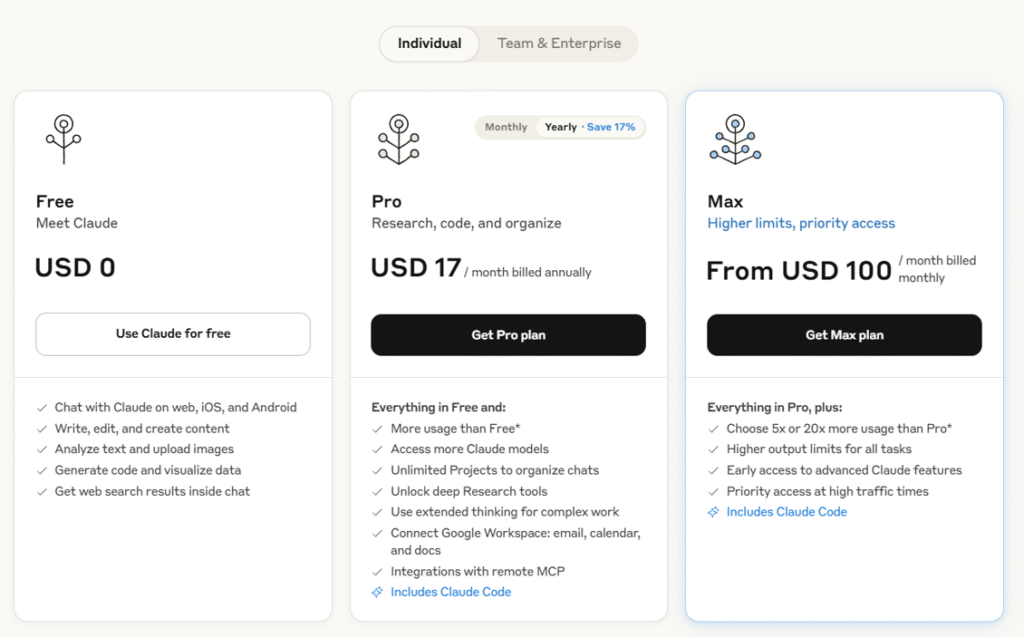
If you’re evaluating ChatGPT vs. Gemini vs. Claude: Which is best for research?, pricing is mostly about: (1) solo plans for individuals, (2) team pricing for small orgs, and (3) enterprise options. Below is a quick, current snapshot (USD; regional taxes may apply).
Solo/creator plans
ChatGPT Plus — $20/month. Highest-value individual tier for most users; adds bigger limits and advanced features over Free. OpenAI
Claude Pro — $20/month (or ~$17/month if billed annually). Pro capacity and priority access; annual discount shown on Anthropic’s pricing page.
Gemini (Google AI Pro) — $19.99/month. Includes Gemini Advanced access plus 2TB storage and AI features across Google apps.
Power/“max” individual tiers
ChatGPT Pro — $200/month. Unlocks the highest access levels (e.g., GPT-5 Pro and expanded limits). OpenAI
Claude Max — $100 or $200/month (Max 5x / Max 20x). Higher usage capacity versions of Claude for heavy users. support.anthropic.com
Small teams
ChatGPT Team — $25 per user/month (annual) or $30 per user/month (monthly). Adds workspace admin controls and higher limits. OpenAIOpenAI Help Center
Claude Team — $30 per user/month. Designed for collaborative use with increased usage versus Pro. support.anthropic.com
Gemini with Workspace — AI now included in Business/Enterprise editions. Example given by Google: a Business Standard customer that used to pay $32/user/month (plan + Gemini add-on) now pays $14/user/month with AI included. (Check your edition and region.) Google Workspace
Enterprise
ChatGPT Enterprise, Gemini Enterprise, and Claude Enterprise are custom-priced with security/compliance, higher limits, and admin controls. (Contact sales pages; pricing varies.) OpenAI+1Google Workspaceanthropic.com
What this means for most buyers
Best low-cost entry:Gemini (Google AI Pro) at $19.99 vs ChatGPT Plus/Claude Pro at $20. Pick based on features you need (browsing/reporting style, file handling, ecosystem).
Best value for small teams:ChatGPT Team at $25/user/mo (annual) is competitively priced and widely adopted; Claude Team is a close alternative at $30/user/mo; Workspace pricing with AI included can be compelling if you already live in Google’s suite. OpenAI Help Centersupport.anthropic.comGoogle Workspace
Heavy individual research: If you routinely hit caps, ChatGPT Pro ($200) or Claude Max ($100–$200) offer the highest ceilings. OpenAIsupport.anthropic.com
Where to add images in this section
Mini pricing table graphic right under the H2 (one row per tool; plans & prices).
Screenshots of the official pricing pages for ChatGPT, Google One AI Pro, and Claude with small captions like “Captured Aug 2025”—helps trust & CTR. OpenAIGoogle Oneanthropic.com
Callout badges next to recommendations (e.g., “Best for teams”, “Best budget”) to make skimming easier.
Live Web Research & Retrieval
ChatGPT — ChatGPT Search
Searches the web directly from chat and returns answers with links to sources. Good for timely topics (news, prices, scores). OpenAI
Gemini — Deep Research
Agentic mode that can automatically browse hundreds of sites, reason through findings, and deliver a structured report—especially useful for broad topics and literature scans. Now powered by Gemini 2.5. Gemini
Claude — Web search
Native, citation-forward browsing. Claude generates targeted queries, fetches results, and includes citations in its responses; web search is available across plans and via API. anthropic.com+1Anthropic
Takeaway: For fully automated “research sprints,” Gemini’s Deep Research shines. For cautious, source-backed summaries, Claude’s web search is excellent. ChatGPT is a strong all-rounder for quick answers with links.
Citation Quality & Traceability
Claude: web-search answers include citations by default. Anthropic
Gemini: Deep Research produces multi-page reports with source references within the output. Gemini
ChatGPT: ChatGPT Search supplies links/sources in its results. OpenAI
Takeaway: All three cite; Claude is the most consistently citation-forward in standard chat, while Gemini excels in large, source-rich reports.
Accuracy & Hallucination Resistance
When people search “ChatGPT vs. Gemini vs. Claude: Which is the best research tool?”, they’re really asking: Which one gives the fewest wrong facts—and shows its work? All three still hallucinate at times, but they ship different safeguards and workflows to keep errors in check. OpenAI
ChatGPT (OpenAI)
What helps: Newer GPT-4.1–family models focus on reliability in long context and instruction-following; OpenAI also publishes safety evals you can check for your use cases. OpenAI+1
Reality check: Independent reporting and papers in 2025 note that some reasoning variants (e.g., o3, o4-mini) can hallucinate more than prior models—so enable browsing/grounding and ask for citations when accuracy matters. TechCruncharXiv
Gemini (Google)
What helps:Deep Research plans multi-step web checks and returns a report with linked sources; Google’s double-check (“Search Google”) encourages verifying factual claims right in the UI. blog.google+1Google Workspace
Reality check: The double-check feature isn’t universal in every region/session, and quality can vary by topic—so skim the sources list before you trust an answer. Google Help
Claude (Anthropic)
What helps:Constitutional AI training aims to make Claude refuse to guess and defer when uncertain; Anthropic also publishes guidance to reduce hallucinations with prompting and grounding. AnthropicarXivAnthropic
Reality check: Even with these guardrails, Claude can still be confidently wrong—use explicit instructions like “cite and quote exact lines from sources.” (General best practice; see Anthropic docs.) Anthropic
Quick, practical ways to cut errors (works for all three)
Force grounding: “Browse the web and provide 3+ primary sources. Link each claim.”
Ask for uncertainty: “If unsure, say so and list what you’d need to verify.”
Request quotes + DOIs: “Quote exact lines for key claims and include DOIs/URLs.”
Constrain the domain & time: “Only use peer-reviewed sources since 2023; exclude blogs.”
Verdict for this category
Gemini: Strong for auditable multi-step web checks (Deep Research with linked citations). blog.googleGoogle Workspace
Claude: Good defaults for not guessing and for citation-style answering when prompted. AnthropicAnthropic
ChatGPT: Broadly reliable with the latest GPT-4.1 family, but verify claims—especially if you switch to experimental “reasoning” modes. OpenAITechCrunch
Synthesis & Literature Review Quality
When readers search “ChatGPT vs. Gemini vs. Claude: Which is the best research tool?”, they’re asking which system can ingest lots of material, connect the dots, and surface defensible takeaways with sources. Here’s how each one handles multi-source synthesis and literature-review style work.
ChatGPT (OpenAI)
How it synthesizes: ChatGPT’s built-in web search returns answers with linked sources, which you can expand into summary tables or structured outlines. OpenAIOpenAI Help Center
Working with many papers:Projects let you upload and persist files (PDFs, spreadsheets, images) so the model can synthesize across them—useful for “related work” sections and evidence tables. OpenAI has been increasing file limits for Pro/paid plans. OpenAI Help Center+1
Long context for bigger reviews: OpenAI’s newer models (e.g., GPT-4.1) advertise very large context windows (up to ~1M tokens in the API), which helps keep more of your corpus “in mind” during synthesis. OpenAI Bottom line: Strong day-to-day syntheses with easy linking; best when you combine web results + uploaded PDFs inside a Project for continuity across drafts. OpenAI Help Center
Gemini (Google) — Deep Research
How it synthesizes:Deep Research breaks a topic into steps, searches the web, and returns a consolidated report with key findings and source links—ideal for literature-review style write-ups you can audit. blog.googleGemini
Working with many papers: Google documents long-context models (1M-token class) designed to recall details from multiple long documents, which directly benefits cross-paper synthesis. Google AI for DevelopersarXiv Bottom line: Best fit when you want step-wise, auditable synthesis that shows how claims map to sources, especially across big document sets. blog.google
Claude (Anthropic)
How it synthesizes:Claude’s web search feature pulls fresh material and automatically cites sources in its answers, which encourages verifiable summaries and comparative matrices. Anthropic
Working with many papers: Recent updates have expanded context window capacity (industry coverage reports 1M-token-class options), improving Claude’s ability to summarize large corpora without heavy chunking. The Verge Bottom line: Great when you want citation-forward, high-recall summaries and conservative phrasing that avoids over-claiming while still pulling threads across many documents. Anthropic
How to get higher-quality literature reviews (works in all three)
Force structure: “Create a 4-column evidence table (Study, Year, Method, Key Finding) + a 5-bullet ‘What the field agrees on / disagrees on’ summary.”
Demand auditable claims: “For every claim, add a bracketed [#] linked to the exact URL/DOI and quote the verifying line.”
Scope precisely: “Prioritize RCTs and meta-analyses since 2023; exclude opinion pieces.”
Iterate: “List gaps/limitations and 3 follow-up searches you’d run next.”
Verdict for this category
Deep, step-wise synthesis with a clear sources panel:Gemini (Deep Research). blog.google
Citation-rich narrative summaries with conservative tone:Claude. Anthropic
Flexible everyday syntheses that blend web + your PDFs inside one workspace:ChatGPT (especially with Projects and large-context models). OpenAI Help CenterOpenAI
Long-Context Handling & File Uploads
For “ChatGPT vs. Gemini vs. Claude: Which is the best research tool?”, long-context capacity and file handling determine how big a reading list you can ingest at once—and how painlessly you can synthesize it. Below is what matters now, with verified limits and gotchas.
ChatGPT (OpenAI)
Context window (API): OpenAI’s GPT-4.1 supports up to ~1M tokens in the API—useful for very large corpora and multi-PDF reviews. OpenAIOpenAI Platform
Projects & persistence: Projects let you keep chats, instructions, and files together so the model can reference them across sessions. (It’s designed for bigger, ongoing work.) OpenAI Help Center
File limits (ChatGPT app):512 MB per file; document uploads are additionally capped at ~2M tokens per file (spreadsheets have separate limits). Plus: up to 20 files per Project; Pro/Team/Edu/Enterprise: up to 40; 10 files per upload batch. OpenAI Help Center+2OpenAI Help Center+2 Takeaway: If you’re comfortable orchestrating your review in Projects and occasionally pushing heavy synthesis to the API, ChatGPT handles very large contexts and sizeable files with straightforward, well-documented limits. OpenAIOpenAI Help Center
Gemini (Google)
Context window: In the consumer app (Google AI Pro / Gemini in Pro), Google advertises ~1M tokens of context; in developer stacks, Gemini 1.5/2.5 Pro can reach 2M tokens (Vertex AI / Gemini API). Gemini+1Google Developers BlogGoogle Cloud
Deep Research + files: Deep Research can search the web and synthesise while also letting you upload your own files into the investigation. Gemini
File limits (Gemini Apps): Up to 10 files per prompt; most files up to 100 MB, videos up to 2 GB. You can also attach a GitHub repo (up to 5,000 files, 100 MB total) to a chat. Google Help+1 Takeaway: If you want huge context without touching code, Gemini in Pro is strong; if you build tooling or need maximal headroom, Vertex/Gemini API unlocks the 2M-token tier. Google Cloud
Claude (Anthropic)
Context window:Claude Sonnet 4 now offers an up-to-1M-token context via API (currently behind a beta flag); earlier public configs were smaller. Check your interface/tier. Anthropicanthropic.com
File limits (Claude.ai chat): Typically 30 MB per file and up to 20 files per chat in the web app; API storage allows larger files (up to 500 MB) and org-level quotas. Anthropic Help CenterAnthropic Takeaway: For long-document reviews, Claude via API now competes on raw context; the chat UI favors many medium-sized uploads with conservative, citation-friendly synthesis. Anthropic
Multimodal Research (PDFs, Tables, Images)
multimodal skills matter: can the tool read PDFs, extract tables, and interpret figures/images reliably? Here’s what each one offers today.
ChatGPT (OpenAI)
PDFs & tables: Reads PDFs and can interpret embedded visuals (charts, diagrams) in PDFs—especially on Enterprise, which explicitly supports visual understanding inside PDFs. OpenAI Help Center
Images & screenshots: Vision models can analyze images, reason over charts and tables in pictures, and combine this with web search or Python-based Data Analysis for deeper work (CSV/Excel). OpenAI+1
File handling (quick recap): Upload common docs/spreadsheets; clear limits and project-based organization help manage large literature sets. OpenAI Help Center+2OpenAI Help Center+2 Use it when: You need a single workspace to mix PDFs + spreadsheets + images, and want to chart or clean data alongside document reading.
Gemini (Google)
PDFs & images: Gemini Apps let you upload multiple files (Docs/PDFs/Word, images, videos) in one prompt; Advanced tiers provide longer context for big PDFs. Google HelpGemini
Deep Research + files: You can add your own files into Deep Research so the system cross-references uploads with the open web and returns a sources-linked report. Gemini
Multimodal models: Current Gemini models accept images, audio, video, and text as inputs, designed for complex multimodal reasoning (dev/API paths). Google AI for Developers Use it when: You want auditable, step-wise synthesis that blends your PDFs/images with web findings in one linked write-up.
Claude (Anthropic)
PDFs & tables: Claude can process PDFs—including charts and tables—and return structured summaries or extracted tables. Anthropic
Images: The Vision capability handles screenshots, diagrams, and photos with guidance on best practices and limits. Anthropic
Developer workflow: A Files API helps stage recurring documents/datasets for repeated analyses (useful for iterative reviews). File-size and per-chat file-count limits apply in the web app. AnthropicAnthropic Help Center Use it when: You prefer citation-forward, conservative summaries from many uploads, and you may automate pipelines via API.
Practical prompting tips (works in all three)
“Extract all tables in this PDF. Return a CSV for each and note any missing headers/units.”
“For each figure, describe the axes, sample size, and main effect. If unclear, say so.”
“Create a 4-column evidence table (Study, Year, Method, Key Finding) and link each claim to the exact page/figure.”
“If any pages or images couldn’t be read/OCR’d, list them explicitly.”
Verdict for this category
Best for blended multimodal + analysis workflows:ChatGPT (vision + Data Analysis + Projects in one place). OpenAIOpenAI Help Center
Best for auditability across uploads + web:Gemini (Deep Research) with file attachments and a consolidated sources view. Gemini
Best for careful PDF/table summarization with citations & API pipelines:Claude (PDF/table understanding + Files API). Anthropic+1
Data Analysis & Coding for Research
A big differentiator is whether the tool can run code, analyse real datasets (CSV/Excel/JSON/PDF), and produce charts/tables—all with a workflow you can repeat and audit.
ChatGPT (OpenAI)
Built-in Python execution (“Data Analysis”). Inside ChatGPT you can upload files, and the model will write & run Python to clean data, run stats, and generate charts. You can see the code (“View analysis”), interact with tables/charts, and download figures—no separate notebook required. OpenAIOpenAI Help Center
How it works (under the hood). ChatGPT uses pandas for data wrangling and Matplotlib for plots, executing in a secure sandbox (no outbound network). This keeps analyses reproducible and safer for sensitive files. OpenAI Help Center
Use ChatGPT when: you want a no-setup environment to crunch a CSV/Excel quickly, show the exact code used, and export clean visuals—all inside one chat. OpenAI
Gemini (Google)
Notebook-native assistance.Gemini in Colab Enterprise helps you write, explain, and fix Python directly in notebooks—great if you already live in Colab/Jupyter. Google Cloud
Warehouse-side analytics.Gemini in BigQuery can generate SQL and Python, explain queries, and surface insights in BigQuery Studio—handy for medium/large datasets you don’t want to pull out of the warehouse. Google Cloud+1
Use Gemini when: your workflow is notebook-first or data-warehouse-first—you’ll keep code and data where they already live while getting AI help for SQL/Python authoring. Google Cloud
Claude (Anthropic)
Runs code in-app (JS) + via API (Python). In Claude.ai, the Analysis tool can run JavaScript in a built-in sandbox for data tasks (feature preview). For programmatic pipelines, the Code Execution tool (API, beta) lets Claude run Python in a secure sandbox to analyze files and create visualizations. You can also extend Claude with tool use for custom workflows. anthropic.comAnthropic+1
Use Claude when: you want conservative, step-by-step analysis and plan to embed code execution in a repeatable API/agent pipeline. Anthropic
Practical prompts that work (all three)
“Load this CSV, fix missing values, and produce a summary table + histogram. Share the code.”
“Create a reproducible pipeline: data load → clean → model (logistic regression) → metrics (AUC, confusion matrix) → chart.”
“Export a tidy CSV of the final table and a PNG of the chart.”
“If any step fails, show the error and the revised code you used to fix it.”
Verdict for this category
Fast, no-setup analysis with charts & visible Python:ChatGPT (Data Analysis is the most turnkey for non-coders). OpenAIOpenAI Help Center
Best inside notebooks or BigQuery:Gemini (strong Colab/BigQuery integration for Python/SQL at source). Google Cloud+1
Best for agentic/API pipelines with code execution:Claude (JS in app; Python sandbox via API beta + tool use). anthropic.comAnthropic
Structured Outputs & Exports
This section focuses on how cleanly each tool can return structured data (JSON/CSV/tables) and export your work to docs, sheets, or files you can reuse.
ChatGPT (OpenAI)
Schema-true JSON (API). OpenAI’s Structured Outputs lets you enforce a JSON Schema so responses must match the shape you define (great for evidence tables, study metadata, etc.). OpenAI Platform+1
Downloadables in the app. With Data Analysis, ChatGPT can generate and let you download CSVs/plots right from the chat (you can also view the exact Python it ran for reproducibility). OpenAI Help Centermitsloanedtech.mit.edu
Shareable links. You can create shared links to a conversation for quick collaboration (handy when passing a structured summary to teammates). OpenAI Help Center Use it when: you need guaranteed JSON from the API and quick CSV/figure exports from an analysis run—without leaving the chat. OpenAI PlatformOpenAI Help Center
Gemini (Google)
Schema-true JSON (API). Gemini supports structured output via a responseSchema (AI Studio/Google AI for Devs) and Vertex AI (“response schema”)—useful when you need strict, machine-readable results. Google AI for DevelopersGoogle Cloud+1
One-click Workspace exports. From Gemini Apps you can Export to Docs/Gmail, and for tables you can Export to Sheets. Deep Research reports also include Export to Docs from the Canvas panel. Google Help+2Google Help+2 Use it when: your workflow revolves around Google Docs/Sheets and you want auditable, exportable research reports with minimal friction. Google Help+1
Claude (Anthropic)
Schema control (API). Claude can be guided to emit JSON that follows a schema by using tools/tool use—a common pattern for reliable structured output. Anthropic’s docs also cover “JSON mode” style prompts to increase output consistency. Anthropic+2Anthropic+2
Artifacts & sharing.Artifacts present substantial, standalone outputs (documents, code, data apps) in a dedicated pane you can share or build on; org admins can also export org data from settings. Anthropic Help Center+1anthropic.com Use it when: you want conservative, citation-forward summaries plus programmatic JSON for pipelines—especially if you’ll package results as Artifacts. Anthropic
Practical formats to request (works in all three)
JSON with schema: “Return results in JSON; keys: study, year, method, n, effect_size (float), doi (string).” (For APIs, attach a JSON Schema.) OpenAI PlatformGoogle AI for Developers
CSV export: “Output the extracted table as a downloadable CSV and include a quick data dictionary.” OpenAI Help Center
Docs/Sheets handoff (Gemini): “Format as a table, then Export to Docs / Export to Sheets.” Google Help+1
Quick verdict (structured outputs & exports)
Most robust JSON guarantees (API): ChatGPT and Gemini with JSON Schema/response schema; Claude achieves schema-true JSON reliably via tool use. OpenAI PlatformGoogle AI for DevelopersAnthropic
Smoothest document handoff: Gemini, thanks to built-in Export to Docs/Sheets and Deep Research Export to Docs. Google Help+1
Researcher-friendly CSV/plot exports from a chat: ChatGPT Data Analysis (download files + visible code). OpenAI Help Center
Integrations & Ecosystem
ChatGPT (OpenAI)
Connectors (built-in): Official connectors let ChatGPT pull from third-party apps (e.g., Google Drive, GitHub, SharePoint) inside a chat. In August 2025, OpenAI added Gmail, Google Calendar, and Google Contacts connectors for Plus/Pro users. OpenAI Help Center+1
Cloud files in chat: You can add files directly from OneDrive/SharePoint via URL, making it easy to analyze documents without manual downloads. OpenAI Help Center
Actions & function calling (for APIs): Build GPTs that call external REST APIs via GPT Actions, or wire up your own endpoints with function calling—useful for custom research pipelines. OpenAI Platform+1
Agentic workflow: The new ChatGPT agent can navigate sites, work with files, and connect to third-party data sources to complete multi-step tasks. OpenAI Help Center
Automation ecosystem: Broad first-party and Zapier support to trigger cross-app workflows. Zapier
Best if: You want a wide, fast-moving ecosystem (connectors + Actions + Zapier) that can reach email, calendars, cloud drives, and custom APIs—all from one chat. OpenAI Help CenterOpenAI Platform
Gemini (Google)
Workspace-native: Gemini runs insideGmail, Docs, Sheets, and Drive, with one-click Export to Docs/Sheets and side-panel assistance—great for turning research into shareable docs. Google HelpGoogle Workspace
Deep Research + files: You can include your own files in Deep Research so the write-up cross-references uploads with the open web and returns linked sources. Google Help
Data stack integrations:Gemini in BigQuery (SQL/Python assist) and Gemini in Colab Enterprise support notebook/warehouse-first analysis without moving data. Google Cloud+2Google Cloud+2
Extensions (apps): Gemini Apps can pull from Google services like Maps, Flights, YouTube and more, when enabled. Google Help
Best if: Your team already lives in Google Workspace or BigQuery/Colab and you want the smoothest path from research → Docs/Sheets with minimal glue code. Google Help
Claude (Anthropic)
Workspace connections: Claude now offers Google Workspace integrations to search Gmail, review Docs, and see Calendar context—handy for research briefs and literature management. anthropic.com
Tool use / API ecosystem: Robust tool use lets Claude call your services (server/client tools), including web search and custom APIs, so you can stitch research workflows programmatically. Anthropic
Artifacts (shareable outputs):Artifacts package substantial outputs (docs, code, mini-apps) you can share and iterate on—useful for publishing research summaries or data apps internally. anthropic.com+1
Automation:Zapier supports Claude, so you can trigger downstream tasks (e.g., file-to-brief pipelines). Zapieranthropic.com
Best if: You want conservative, citation-forward research plus programmable tool use and shareable Artifacts for repeatable internal workflows. Anthropicanthropic.com
Quick verdict (integrations & ecosystem)
ChatGPT: Broadest connector mix + Actions + agent—strong for heterogeneous stacks and custom API workflows. OpenAI Help CenterOpenAI Platform
Gemini: Easiest Workspace-native path from insights to Docs/Sheets; strong data-side hooks (BigQuery, Colab). Google HelpGoogle Cloud
Claude: Clean Workspace tie-ins, robust tool use, and Artifacts for packaging research deliverables. anthropic.comAnthropic
Privacy, Security & Compliance
If you’re targeting “ChatGPT vs. Gemini vs. Claude: Which is the best research tool?”, readers will care about four things: (1) training use of their data, (2) certifications & legal addenda (DPA/BAA), (3) encryption & retention controls, (4) data residency/sovereignty. Here’s the current, vendor-official picture.
ChatGPT (OpenAI)
Training defaults (business tiers): OpenAI says ChatGPT Team, Enterprise, and Edu data isn’t used to train models by default; you own your inputs/outputs. OpenAI+1
Consumer controls: Individuals can opt out of training via Data Controls. OpenAI Help Center+1
Certifications & security: SOC 2 Type 2; AES-256 at rest and TLS 1.2+ in transit. OpenAI+1
Retention & ZDR: API data is typically retained up to 30 days for abuse monitoring; Zero Data Retention (ZDR) is available for eligible endpoints/customers. OpenAI
Data residency: Options now include US, Europe, Japan, Canada, South Korea, Singapore, and India (relevant for regulated/geofenced workloads). OpenAI Help CenterOpenAI
Compliance paperwork:DPA available; BAA available for qualifying healthcare/API use cases. OpenAI+1
Third-party connectors caution: When using GPT Actions/connected APIs, your data may go to that third party—use only services you trust. OpenAI Help Center
Good fit when: you need broad compliance features (SOC 2, DPA/BAA), multi-region residency including India/EU, and fine-grained retention controls/ZDR for API workloads. OpenAI Help CenterOpenAI
Gemini (Google)
Workspace data use: Google states your organization’s Workspace data is not used to train Gemini models or for ads, with DLP, IRM, and client-side encryption (CSE) controls. Google Workspace
Certifications & HIPAA: Google highlights SOC 1/2/3, ISO 27001/27701 and support for HIPAA scenarios in Gemini for Workspace. Google Workspace+1
Sovereignty tooling: Workspace offers controls for digital sovereignty (admin policies, regional controls) helpful to compliance teams. Google Workspace+1
Consumer app privacy notes: Recent Personal Context and Temporary Chats features let you choose what Gemini remembers and what isn’t stored/used—useful for personal research privacy. The VergeAndroid Central
Good fit when: your org already runs on Google Workspace and you want native Docs/Sheets/Gmail integrations under enterprise terms that don’t train on your domain’s data. Google Workspace
Claude (Anthropic)
Training defaults: Anthropic says it doesn’t use inputs/outputs from both consumer (Free/Pro/Max) and commercial products to train models—unless you explicitly opt in or report content. Anthropic Privacy Center+1
Role & agreements: For commercial customers, Anthropic acts as a data processor; BAA is available for HIPAA-eligible API use (with feature limits like web search excluded under the BAA). Anthropic Help CenterAnthropic Privacy Center+1
Good fit when: you want privacy-forward defaults, HIPAA-eligible API paths under a BAA, and a vendor that positions itself as a strict processor for enterprise use. Anthropic Privacy CenterAnthropic Help Center
Practical checklist (what to enable regardless of vendor)
Lock retention (short windows or ZDR on API where eligible). OpenAI
Use regional storage/processing to meet residency rules (EU/India/Asia options exist). OpenAI Help Center
Route sensitive workloads through first-party, compliant paths (e.g., Workspace Gemini, ChatGPT Enterprise/API with ZDR, Claude API with BAA). Google WorkspaceOpenAIAnthropic Privacy Center
Review third-party tool permissions (connectors, Actions, extensions). OpenAI Help Center
Verdict for this category
Most “Workspace-native” compliance out-of-the-box:Gemini (no training on domain data, CSE/DLP/IRM, broad certifications). Google Workspace+1
Broader residency/ZDR knobs across stacks:ChatGPT (Team/Enterprise/Edu no-training, SOC 2, multi-region data residency, API ZDR). OpenAI+1OpenAI Help Center
Privacy-forward defaults with HIPAA-eligible API:Claude (no training by default; BAA for qualifying use; strong certs). Anthropic Privacy Center+1
That’s the compliance angle behind “ChatGPT vs. Gemini vs. Claude: Which is the best research tool?”—choose based on your stack, regulatory scope, and residency needs.
Speed, Reliability & Rate Limits
For the query “ChatGPT vs. Gemini vs. Claude: Which is the best research tool?”, engineers and writers mainly care about three things: (1) how fast the first token arrives (perceived speed), (2) platform reliability/uptime, (3) the practical ceilings set by rate limits.
ChatGPT (OpenAI)
Speed
The Responses API supports streaming, so you can render text as it’s generated (fast first token; lower perceived latency). OpenAI Platform+1
Reliability
OpenAI publishes a public status page. Over May–Aug 2025 the dashboard shows ~99.66% API uptime and ~99.43% ChatGPT uptime, with incident history you can audit. OpenAI Status+1
Rate limits
API limits are tiered by org and model and measured in RPM / TPM / RPD (requests & tokens). See the official Rate limits guide; Azure OpenAI documents the same RPM/TPM model on Azure. OpenAI PlatformMicrosoft Learn
In the ChatGPT app, message caps exist per model; for example, current help content lists a GPT-5 cap of ~160 messages per 3 hours for Plus (subject to change). OpenAI Help Center
What it means in practice: use streaming for responsiveness, and design your app for graceful backoff when RPM/TPM thresholds are hit.
Gemini (Google)
Speed
Google offers a Live API for low-latency, real-time interactions (voice/video/text), designed to minimize round-trip delays for interactive experiences. Google AI for Developers
Gemini supports streaming in its developer stack (SSE-style delivery) via Google’s tooling; see rate-limits docs for usage patterns. Google AI for Developers
Reliability
Google exposes service health via the Google Cloud Status Dashboard (Workspace/Vertex services are tracked there). A dedicated Gemini-only uptime page is not separately listed; most teams monitor Google Cloud’s board and issue trackers. status.cloud.google.comGoogle AI Developers Forum
Rate limits
Gemini API documents limits by RPM / TPM / RPD and evaluates usage per project. Vertex AI additionally documents quota ceilings (e.g., token-per-request caps and embedding limits). Google AI for DevelopersGoogle Cloud
What it means in practice: If you want snappy, live interactions (e.g., research assistants that “talk back”), Gemini’s Live API is purpose-built; for large-scale jobs use Vertex quotas and watch per-project rate limits. Google AI for Developers
Claude (Anthropic)
Speed
The Messages API supports SSE streaming; you can set stream: true to start receiving tokens immediately. Anthropic+1
Reliability
Anthropic publishes uptime for claude.ai and api.anthropic.com. Recent 90-day windows show ~99–100% service availability; monthly uptime is listed on a public page. status.anthropic.com+1
Rate limits
Limits are transparent and tiered by model. Example (Messages API, per org tier): Claude Opus 4.x / Sonnet 4 can reach hundreds of thousands to millions of tokens/minute at higher tiers (e.g., ITPM 450k → 2,000,000; OTPM 90k → 400k; RPM 1,000 → 4,000). Exceeding limits returns HTTP 429 with a retry-after. Anthropic
What it means in practice: Claude is easy to plan capacity for because Anthropic publishes concrete token ceilings and 429 retry guidance. Anthropic
Practical tips to actually go fast (works for all three)
That’s the speed/limits lens on “ChatGPT vs. Gemini vs. Claude: Which is the best research tool?”—pick based on whether you need snappy live UX, bulk token throughput, or broad stability + ecosystem.
Cost & Value for Money
If someone is Googling “ChatGPT vs. Gemini vs. Claude: Which is the best research tool?”, they’re usually weighing monthly price vs. what you actually get (limits, features, and extras like storage or integrations). Here’s a crisp, current view.
Snapshot — individual plans
ChatGPT Plus — $20/month. Straightforward upgrade for higher limits and premium features. OpenAI
Google AI Pro (Gemini) — $19.99/month. Includes Gemini 2.5 Pro access, Deep Research, and 2 TB Google One storage; also unlocks Gemini in Gmail/Docs (in supported languages). Gemini
Claude Pro — $20/month or ~$17/month if billed annually ($200 up-front). Good value if you prefer annual billing. anthropic.com
Value tip (solo): Price is basically a tie at ~$20/mo. Gemini’s bundle (2 TB storage + Workspace tie-ins) is a strong sweetener; Claude can be a hair cheaper on annual. Geminianthropic.com
Teams & orgs
ChatGPT Team — $25/user/mo (annual) or $30/user/mo (monthly). Predictable per-seat pricing with a shared workspace. OpenAI Help CenterOpenAI
Gemini in Workspace — AI now “baked in” to Workspace plans (no separate add-on); net uplift depends on SKU. Google’s 2025 change simplified pricing by including Gemini features in core plans (example uplift was +$2/user/mo in Google’s announcement). Exact per-seat varies by Workspace tier and region. Google Workspace+1
Claude Team — $30/user/mo (or $25 on annual). Team workspace with admin/billing. Enterprise is quote-based. anthropic.com
Value tip (teams): If you already pay for Google Workspace, the bundled Gemini route can be most economical. Otherwise ChatGPT Team is the clearest sticker price; Claude Team is close and often chosen for its conservative, citation-forward style. Google WorkspaceOpenAI Help Centeranthropic.com
Power tiers & enterprise
ChatGPT Pro — $200/month. Meant for heavy users who want expanded access to the most compute-intensive models/features; API still billed separately. OpenAIOpenAI Help Center
Google AI Ultra — $249.99/month. Highest access/limits across Gemini features (and 30 TB storage). Gemini
Claude Max — from $100/month. Higher usage per session than Pro; Claude Enterprise is custom-priced. anthropic.com
Value tip (heavy users): These tiers only pay off if you genuinely hit limits often (deep research, long context, or heavy multimodal/video). Otherwise the ~$20 plans deliver most day-to-day value.
API pricing (separate from app subscriptions)
If you’ll automate literature reviews or build scripts, costs are pay-as-you-go:
Gemini API: published per-million-token rates (2.5 Pro tiers) plus separate Google Search grounding charges. Google AI for Developers
Anthropic API: per-model token pricing (Opus/Sonnet/Haiku) and add-ons like web search or code execution. anthropic.com
Value tip (builders): Use prompt caching/response schema where offered and batch long jobs to cut costs substantially. (All three provide caching/quotas in docs.) Google AI for Developersanthropic.com
Bottom-line verdict for “Cost & Value for Money”
Best bundle for the price (solo):Gemini (Google AI Pro) — same sticker as ChatGPT Plus but throws in 2 TB storage and tight Workspace integration. Gemini
Most predictable per-seat for non-Google shops (teams):ChatGPT Team at $25–$30/user/mo. OpenAI Help Center
Cheapest annual path (solo) + conservative style:Claude Pro at ~$17/mo when billed annually; Team matches ChatGPT’s ballpark. anthropic.com
Power users: Step up only if you constantly hit limits—ChatGPT Pro ($200) / AI Ultra ($249.99) / Claude Max (from $100) are premium and situational. OpenAIGeminianthropic.com
Self-publishing is no longer a second option—it’s a thriving path for modern authors. In 2025, new platforms, AI-assisted tools, and global distribution channels make it easier than ever to publish a professional-quality book on your own terms.
In this post, we’ll walk you through How to Self-Publish Your Book 2025: Step-by-Step for Beginners, covering every major phase you need to launch successfully, including the essential details on how to self-publish your book.
Table of Contents
A. Define Your Book’s Purpose and Audience
Before you start writing, you need clarity on two key things: why you’re writing the book and who you’re writing it for. This step forms the foundation for everything else covered in How to Self-Publish Your Book. Without a clear purpose and audience, your book will struggle to connect or sell.
Understanding how to self-publish your book is the key to taking control of your writing career.
1. Know Your “Why”
Ask yourself:
Are you writing to teach, inspire, entertain, or persuade?
Do you want to build authority, launch a business, or share a personal story?
Is your goal to reach a wide audience or a niche community?
Clarity here will guide your tone, format, and marketing strategy later on.
2. Identify Your Ideal Reader
You can’t write a book for everyone. Instead, define your ideal reader — the person most likely to buy and benefit from your book.
Ask:
What age group are they in?
What are their interests, struggles, or dreams?
What kind of books do they already read?
Create a simple reader avatar (also known as a reader persona). For example: “Emily is 29, loves personal development books, listens to podcasts, and wants to write her first book but doesn’t know where to begin.”
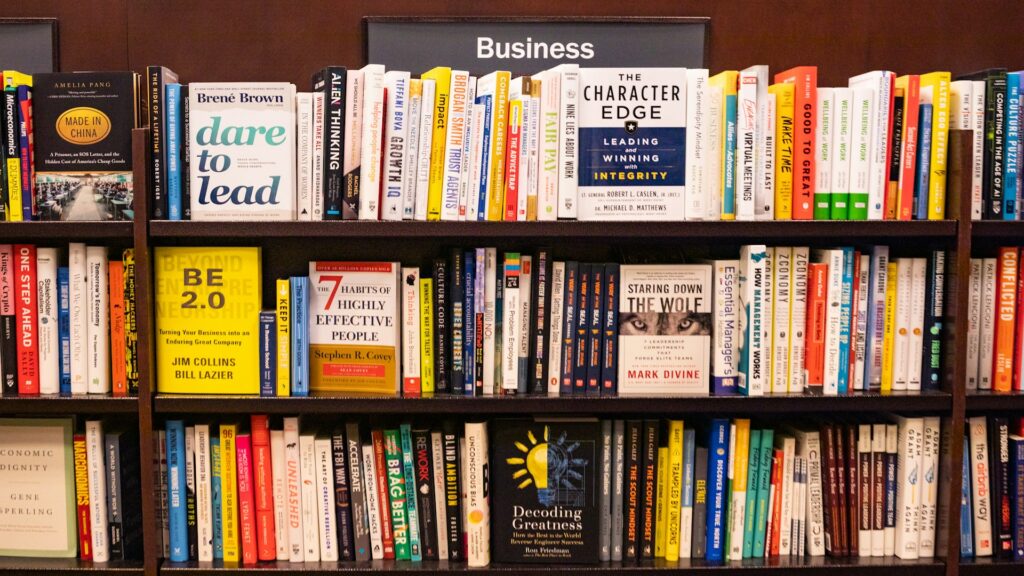
3. Research Your Niche
Use tools like:
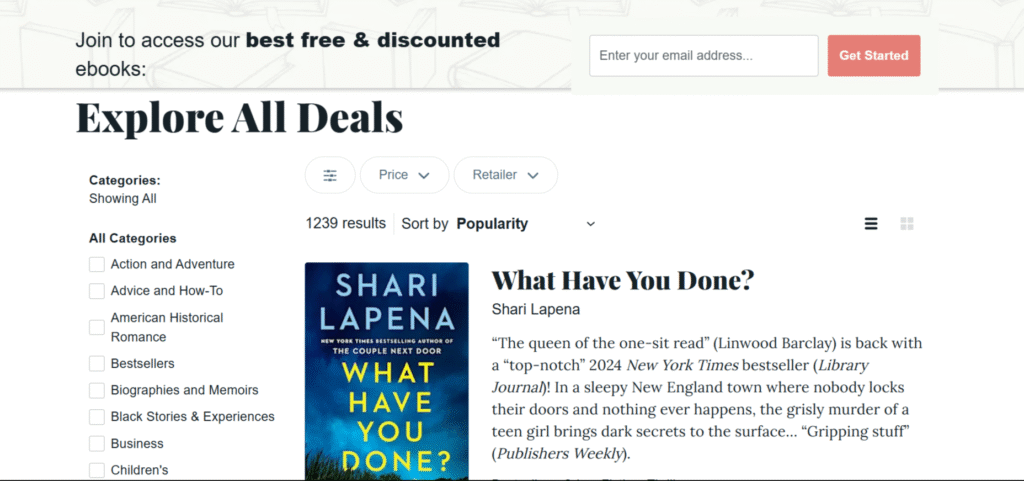
Amazon Best Sellers lists
Google Trends
Publisher Rocket to explore what your target readers are already buying and searching for.
This helps you position your book with the right title, keywords, and category, which are all critical for discoverability — a key theme in How to Self-Publish Your Book.
4. Align Purpose with Audience
Once you’ve defined your purpose and reader, align the two. For example:
If you’re writing to teach time management to young professionals, make sure your tone is straightforward, modern, and practical.
If your book is a memoir about overcoming trauma, focus on emotional connection and relatability.
Final Tip
Keep your purpose and audience visible as you write — literally. Print your reader avatar or purpose statement and keep it near your writing space. This keeps you focused and consistent throughout the writing and publishing process.
B. Writing the Book
Once you’ve defined your purpose and audience, it’s time to start writing. This section walks you through how to write efficiently, avoid overwhelm, and stay on track—even if it’s your first book.
1. Create a Simple Outline
Start with a basic structure to organize your thoughts. Your outline doesn’t need to be perfect, but it should include:
A working title
Chapter topics or major themes
Bullet points under each chapter to guide content
Outlining saves time and prevents writer’s block by giving you a clear roadmap.
2. Set a Writing Routine
Writing a book takes consistency. Here’s how to stay productive:
Set a daily or weekly word count goal (e.g., 500–1,000 words/day)
Choose a dedicated time and place to write
Use a distraction-free writing tool (like FocusWriter or Scrivener)
Even writing a small amount daily adds up. A 50,000-word book can be written in just 2–3 months with steady effort.
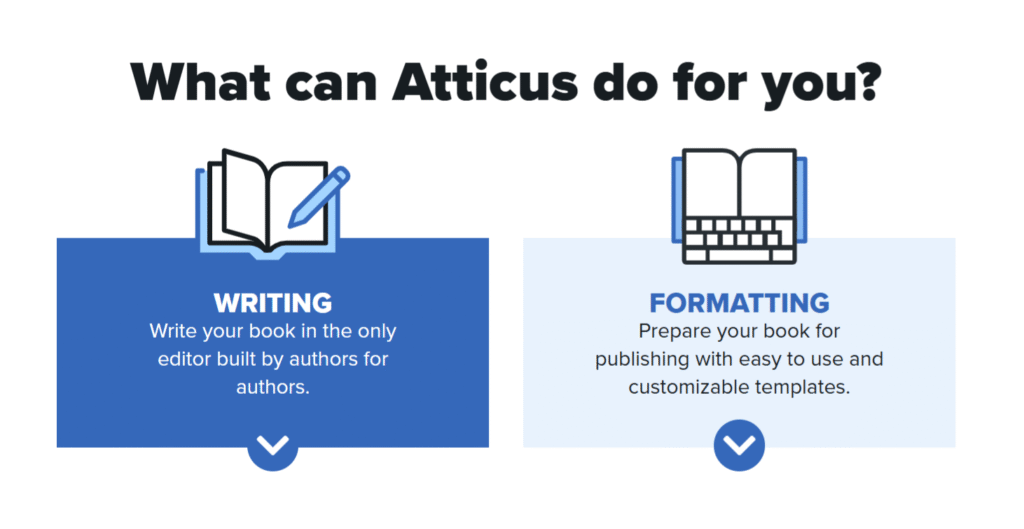
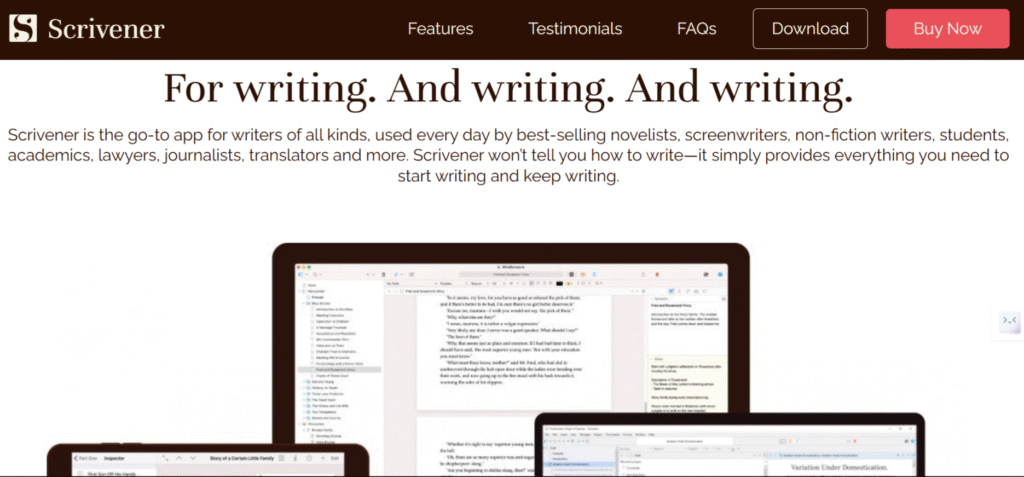
3. Use Writing Tools to Stay Focused
The right tools can make the writing process smoother. Here are a few author favorites in 2025:
Scrivener – Great for organizing chapters and research
Atticus – All-in-one writing and formatting tool
Google Docs – Ideal for collaboration and cloud access
Hemingway Editor – Helps simplify your writing
Many beginner authors featured in The Ultimate Guide to Self-Publishing in 2025: Step-by-Step for Beginners credit their success to combining great tools with a steady routine.
4. Write Now, Edit Later
Don’t get stuck trying to perfect every sentence. First drafts are supposed to be messy. Focus on getting the words out, and leave the fine-tuning for the editing phase.
Avoid backspacing too much
Use placeholders (e.g., [insert stat], [fact check this])
Push through to the end — you can fix it later
5. Keep Your Reader in Mind
As you write, always think about your ideal reader. Ask:
Will this chapter help them?
Is the tone relatable for my audience?
Am I writing with clarity and purpose?
This ensures your content stays relevant, engaging, and marketable — a key principle in The Ultimate Guide to Self-Publishing in 2025: Step-by-Step for Beginners.
Final Tip
Perfection isn’t the goal — completion is. Your book can’t change lives if it stays in your head. Stay consistent, trust the process, and remember: every bestselling author started with a first draft just like yours.
C. Editing Like a Pro
One of the most important — and often underestimated — steps in How to Self-Publish Your Book is editing. Great editing transforms your manuscript from a rough draft into a polished, professional book that readers trust and enjoy.
You don’t need to be a grammar expert to edit like a pro. You just need the right process, tools, and mindset.
1. Understand the 3 Stages of Editing
Professional editing is typically done in layers. Each stage serves a different purpose:
Developmental Editing Focuses on big-picture issues like structure, plot holes, pacing, and character development (for fiction) or logical flow (for nonfiction).
Line Editing Improves the clarity, tone, and readability of your writing without changing the core content.
Copyediting & Proofreading Fixes grammar, punctuation, spelling, and formatting errors — the final polish before publishing.
2. Let Your Manuscript Rest
Before jumping into edits, take a break. Give yourself a few days (or even a week) away from your manuscript. This “cooling off” period allows you to return with fresh eyes and spot mistakes you missed before.
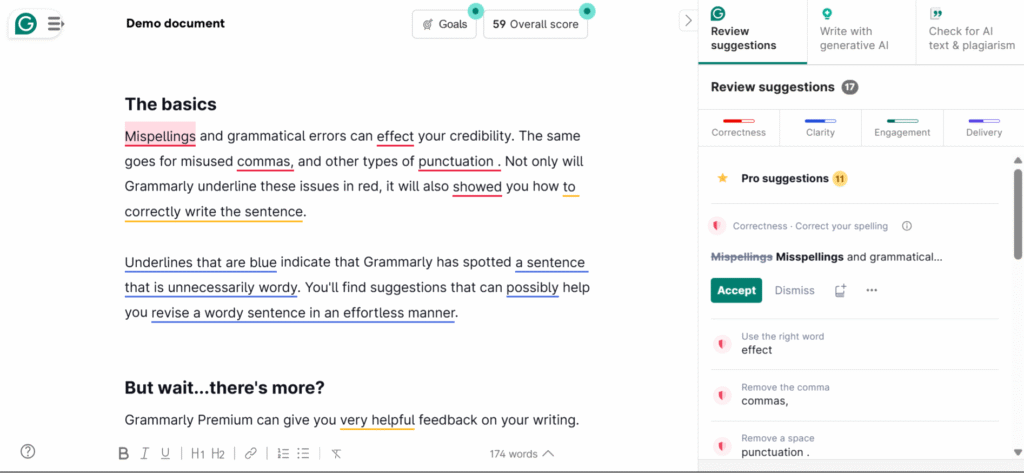
3. Start with Self-Editing Tools
Self-editing is your first pass. In 2025, several AI-powered tools make this step much easier:
Grammarly – Great for basic grammar and clarity suggestions
ProWritingAid – Offers in-depth style, pacing, and readability reports
Hemingway Editor – Highlights overly complex sentences and passive voice
ChatGPT – Can help rephrase awkward paragraphs or check tone consistency
These tools won’t replace a professional editor, but they will significantly clean up your draft before outsourcing.
4. Get Human Feedback
No tool can replace the insights of a real person. After self-editing, consider:
Beta readers – Give honest, reader-level feedback on clarity, engagement, and structure.
Professional editors – Offer expertise in developmental, line, and copyediting. Look for editors who specialize in your genre.
You can find vetted editors on platforms like Reedsy, Fiverr Pro, or Upwork, depending on your budget.
5. Don’t Skip Proofreading
Proofreading is the final sweep to catch typos, punctuation mistakes, or formatting issues. Even professionally edited books can have lingering errors — don’t skip this final polish.
You can either:
Hire a proofreader
Use tools like PerfectIt or Linguix
Print a physical copy and proof it manually (surprisingly effective!)
Final Tip
Editing can feel overwhelming, but it’s a critical part of producing a high-quality book. Take your time, use the best tools available, and don’t be afraid to invest in professional help when needed. In The Ultimate Guide to Self-Publishing in 2025: Step-by-Step for Beginners, editing isn’t an afterthought — it’s a superpower.
D. Formatting for eBook and Print
Formatting may not be the most glamorous part of writing a book, but it’s one of the most crucial. If your book doesn’t look good on the page or screen, readers won’t take it seriously — no matter how great the content is.
In How to Self-Publish Your Book, formatting is where your manuscript transforms into a professional product ready for digital stores and physical shelves.
1. Understand the Two Main Formats
You’ll need two different versions of your book:
eBook Format (ePub or MOBI): Designed for screens — flexible layout that adapts to devices like Kindle, Kobo, and tablets.
Print Format (PDF): A fixed layout optimized for paperback or hardcover printing (used by platforms like Amazon KDP or IngramSpark).
2. Use the Right Tools
Gone are the days of wrestling with Word files. In 2025, several tools make formatting easy, even for beginners:
Atticus – An all-in-one writing and formatting tool for eBook and print
Vellum – Mac-only, ideal for clean and beautiful formatting
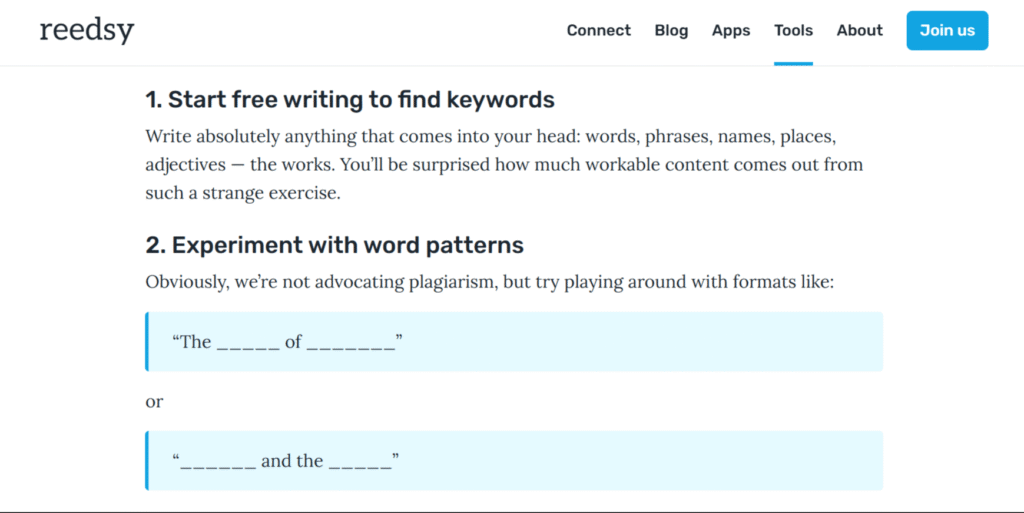
Reedsy Book Editor – Free browser-based formatting tool
Scrivener – Offers advanced export options with templates
Calibre – Great for converting between file types like MOBI and ePub
Each of these tools has templates, preview features, and export options tailored for different platforms.
3. eBook Formatting Best Practices
When formatting for eBooks:
Use a reflowable layout (text adjusts to screen size)
Avoid page numbers — eReaders handle that
Use simple fonts (e.g., Times New Roman, Georgia)
Include clickable table of contents and chapter links
Embed your cover image in the file.
4. Print Formatting Best Practices
For print books:
Set the correct trim size (e.g., 5″ x 8″, 6″ x 9″) based on your genre
Use justified alignment for body text
Include headers, footers, and page numbers
Start each chapter on a new page
Leave space for a gutter margin (inside margin for binding)
5. Test Before You Publish
Always preview your files before publishing:
For eBooks, use the Kindle Previewer or upload to a test device
For print, order a proof copy from KDP or your printer
This step ensures your text, images, and layout display correctly. Mistakes in formatting can lead to poor reviews or even rejections from publishing platforms.
Final Tip
Formatting is the bridge between writing and publishing. A well-formatted book enhances your credibility and creates a better reader experience. As covered in The Ultimate Guide to Self-Publishing in 2025: Step-by-Step for Beginners, getting your formatting right the first time saves you time, money, and stress.
E. Designing a Cover That Sells
Your book cover is the first impression readers will have. It doesn’t just represent your story — it’s a powerful marketing tool. In fact, many readers will decide whether or not to click on or buy your book based on the cover alone.
That’s why in The Ultimate Guide to Self-Publishing in 2025: Step-by-Step for Beginners, we emphasize that a professional-looking cover can make the difference between a book that sells and one that gets ignored.
1. Know Your Genre Expectations
Every genre has visual trends readers subconsciously expect. For example:
Romance: Soft colors, scripted fonts, often features people
Thriller: Dark backgrounds, bold text, minimal imagery
Study the top-selling books in your genre. Notice the colors, fonts, and image styles they use — then design your cover to align with reader expectations while still standing out.
2. Focus on Readability (Even at Thumbnail Size)
Most readers will first see your book as a small thumbnail on Amazon or other platforms. If they can’t read the title or see the design clearly at a small scale, you could lose their attention.
Key tips:
Use large, high-contrast fonts
Keep it simple and uncluttered
Make sure your title and name stand out
3. Hire a Professional Designer (If You Can)
While DIY tools exist, a professional cover designer understands layout, color theory, typography, and genre-specific styles.
Recommended platforms:
Reedsy – Pre-vetted designers by genre
Fiverr Pro – Affordable and fast
99designs – Run a contest and choose your favorite design
If budget is tight, use tools like Canva, BookBrush, or Adobe Express, but always get feedback from other authors or readers before publishing.
4. Include These Key Elements
Your cover should include the following:
Title – Big, bold, and readable
Subtitle (if applicable) – Clarifies your topic or benefit
Author name – Usually at the bottom
Background image or design – Should not overpower the text
Optional: Endorsements, tagline, or series logo
Avoid stock photo clichés, overly busy designs, or outdated fonts.
5. Test Your Cover
Before launching, test your cover with real readers:
Create multiple versions and run a poll in a Facebook group or Reddit thread
Use PickFu to get split-test feedback from potential buyers
Ask: “Which would you click on?” or “What genre does this look like?”
Feedback can reveal surprising insights — sometimes your “favorite” might not be the most effective.
Final Tip
Your book cover isn’t just art — it’s a sales tool. A great cover communicates your genre, your tone, and your professionalism at a glance. As emphasized in The Ultimate Guide to Self-Publishing in 2025: Step-by-Step for Beginners, investing time (and if possible, money) into your cover design can lead to significantly more clicks, downloads, and purchases.
F. Choosing the Right Publishing Platforms
One of the biggest decisions you’ll make in your self-publishing journey is where to publish your book. The platform you choose affects everything — from your book’s visibility and royalties to its format, pricing, and audience reach.
In The Ultimate Guide to Self-Publishing in 2025: Step-by-Step for Beginners, we break down the best publishing platforms and help you choose the ones that match your goals.
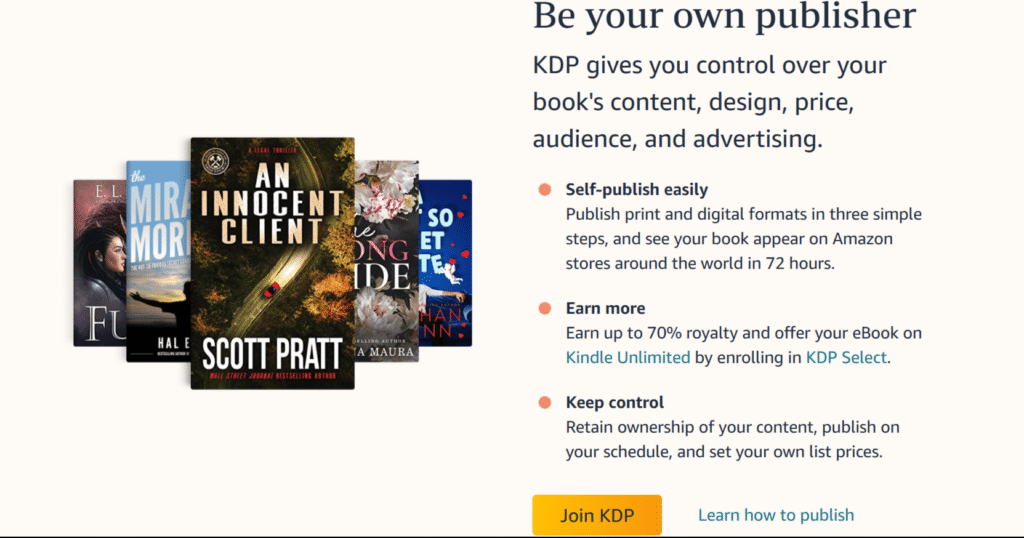
Best for: Maximum exposure, ease of use, Kindle eBooks & paperbacks Royalties: 35% or 70% (eBook), ~60% minus printing cost (print) Exclusivity option: KDP Select (90-day exclusivity for extra perks)
Amazon KDP dominates the self-publishing space. If you’re only going to publish on one platform, this is the one to start with.
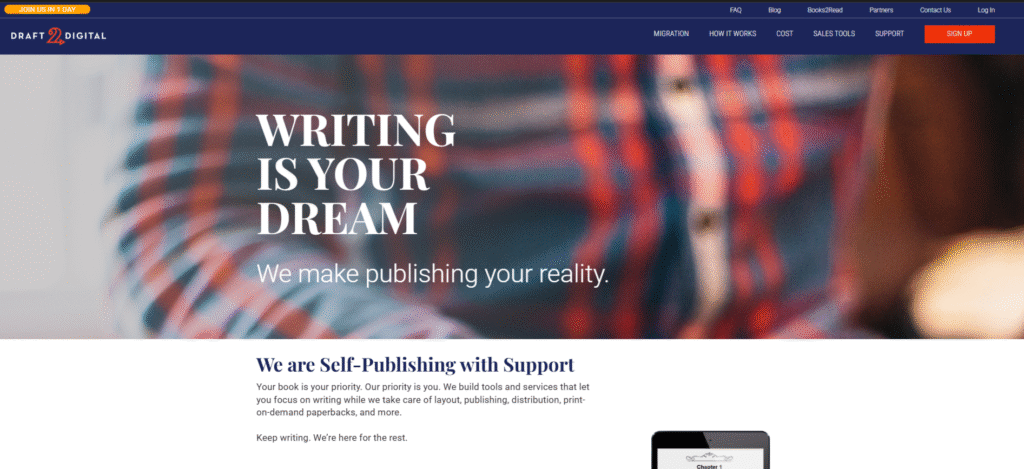
Best for: Wide distribution to non-Amazon stores (Apple Books, Barnes & Noble, Kobo) Royalties: Varies by store (usually 60–70%) Exclusivity: None – can be used alongside Amazon KDP
Draft2Digital (D2D) is ideal if you want to publish “wide” — meaning outside of Amazon. They handle distribution and formatting, and you keep control of your book.
Apple Books: Strong audience among iOS users. Can publish directly via iTunes Connect. Google Play Books: Re-emerging as a key player. Easy discoverability via Google Search.
Note: You can reach both via Draft2Digital if you don’t want to manage separate accounts.
Which Strategy Should You Choose?
There are two main strategies:
Amazon Exclusive (KDP Select) ✔ Best for new authors looking for Amazon visibility ✔ Great for Kindle Unlimited page reads ✘ Limited to Amazon only
Wide Distribution (KDP + D2D + IngramSpark) ✔ Ideal for building long-term revenue across platforms ✔ Not reliant on Amazon ✘ More accounts to manage
Final Tip
As you’ve learned in The Ultimate Guide to Self-Publishing in 2025: Step-by-Step for Beginners, your publishing platform affects your marketing, royalties, and growth potential. Choose the one that aligns with your long-term goals — and remember, you can always adapt your strategy as you grow.
G. Pricing, Royalties, and ISBNs
Understanding the basics of pricing, royalties, and ISBNs is a critical part of Self-Publishing in 2025. These elements impact how much you earn, where your book is distributed, and how professional your book appears to retailers and readers.
1. Pricing Your Book Strategically
Choosing the right price point is both an art and a science. Consider the following when setting your price:
Genre Standards: Research similar books in your category to see common price ranges.
Length and Format: Longer books or print editions typically cost more.
Audience Willingness to Pay: Nonfiction and niche markets may support higher pricing.
Introductory Offers: Consider launching with a lower price or free promo to generate visibility.
Genre
eBook Price Range
Paperback Price Range
Hardcover Price Range
Romance
$2.99 – $4.99
$9.99 – $12.99
$17.99 – $22.99
Mystery/Thriller
$3.99 – $5.99
$10.99 – $13.99
$18.99 – $24.99
Science Fiction
$3.99 – $6.99
$11.99 – $14.99
$19.99 – $25.99
Fantasy
$4.99 – $7.99
$12.99 – $15.99
$20.99 – $26.99
Nonfiction (General)
$4.99 – $9.99
$12.99 – $17.99
$22.99 – $29.99
Business/Self-Help
$6.99 – $11.99
$14.99 – $19.99
$24.99 – $32.99
Memoir/Biography
$5.99 – $9.99
$13.99 – $18.99
$21.99 – $28.99
source- Reedsy, Kindlepreneur.
2. Understanding Royalties
Royalties are the percentage of revenue you earn from each sale. The major platforms offer different royalty rates:
Amazon KDP
eBooks: 70% (priced between $2.99 and $9.99); 35% for other price points
Print books: Typically 60% minus printing costs
Draft2Digital & Other Aggregators
Vary by retailer but generally fall within the 60–70% range
IngramSpark
Allows you to set your own discount for retailers; common royalties range from 40–55%
Only available through KDP for certain trim sizes.
IngramSpark
Paperback/Hardcover
40–55% (you set retailer discount)
Charges setup fees (can be waived with promo codes). ISBN required.
eBook
40% (varies by retailer)
Distribution to Apple Books, Kobo, etc.
Draft2Digital
eBook
~60% (after retailer cut)
Distributes to Apple Books, B&N, Kobo, OverDrive, etc. ISBN provided free.
Print (via D2D Print)
~45% (after print cost & wholesale discount)
Still in beta or limited rollout as of 2025.
3. What You Need to Know About ISBNs
An ISBN (International Standard Book Number) is a unique identifier for your book. Here’s what beginners need to know:
Do you need one?
eBooks: Not always required (Amazon assigns an ASIN instead)
Print books: Strongly recommended, especially for wide distribution
Where to get it?
U.S. Authors: Buy directly from Bowker (myidentifiers.com)
Free ISBNs: Platforms like Amazon KDP and Draft2Digital offer free ISBNs, but they list the platform as the publisher
Why buy your own?
More control over your imprint name
Easier to switch platforms or expand to bookstores.
Final Tip
In The Ultimate Guide to Self-Publishing in 2025: Step-by-Step for Beginners, getting your pricing, royalties, and ISBNs right can make a big difference in both professionalism and profit. Take your time, do your research, and choose what aligns best with your publishing goals.
H. Building a Launch Plan
Publishing your book is only half the battle — launching it effectively is what gets it into readers’ hands. A smart launch plan builds buzz, drives sales, and helps your book rank well on platforms like Amazon.
We stress that even a well-written book can go unnoticed without a solid launch strategy. Here’s how to do it right:
1. Set a Realistic Timeline
Give yourself at least 4–6 weeks before launch day to build momentum. A basic timeline might look like this:
Week 1–2: Finalize book files, build ARC list
Week 3: Schedule promos and email campaigns
Week 4: Push pre-orders and social media content
Launch Day: Go live, email list, promote everywhere
Post-Launch: Collect reviews, run follow-up ads
2. Assemble Your Launch Team
A launch team (also called a street team) is a group of early supporters who help spread the word. They might:
Read and review the book early
Share it on social media
Give feedback on your cover or blurb
Offer them a free copy of your book (ARC) in exchange for an honest review and support.
3. Prepare Your Marketing Materials
Have the following assets ready:
Your book cover and mockups
A strong blurb and tagline
Prewritten social media posts
Email templates for your list
Review request message for ARC readers
Creating these in advance saves time and keeps your messaging consistent.
4. Schedule Promotions and Giveaways
Boost visibility by lining up promotions during launch week:
Free or discounted launch price
List your book on deal sites (e.g., BookBub, Freebooksy, Bargain Booksy)
Use your email list to warm up readers before launch. A simple sequence might include:
Teaser email: “Something big is coming…”
Cover reveal and blurb
Pre-order announcement
Launch day email
Reminder + review request
Also post on your social media regularly with quotes, behind-the-scenes content, and countdowns.
6. Encourage Early Reviews
Ask your launch team and first buyers to leave reviews on Amazon and Goodreads. Social proof drives future sales and boosts your ranking.
Tip: Never ask for 5-star reviews — just honest feedback.
Final Tip
A great launch isn’t just about one big day — it’s about building lasting visibility. As covered in The Ultimate Guide to Self-Publishing in 2025: Step-by-Step for Beginners, a clear and organized launch plan can help your book stand out in a crowded marketplace and build momentum that lasts well beyond release week.
I. Marketing After Launch
Your book is live — congratulations! But don’t stop here. The real success of your self-published book often depends on what happens after launch day. Long-term marketing ensures consistent sales, builds your author brand, and helps you grow a loyal readership.
We emphasize that post-launch marketing is not optional — it’s essential.
1. Build an Author Platform
An author platform is your ongoing connection to readers. After launch, invest time in:
Growing your email list (offer a lead magnet like a bonus chapter or free novella)
Engaging in reader communities (Facebook groups, Reddit, Goodreads)
This builds trust and keeps your book (and future releases) visible.
2. Use Amazon Ads and Meta Ads
Paid advertising is one of the best ways to sustain book sales post-launch.
Amazon Ads (KDP): Target keywords, categories, or similar books.
Meta Ads (Facebook/Instagram): Promote your book to specific reader interests.
Set a small daily budget ($5–10) and monitor ROI.
Start small, test different creatives, and scale what works.
3. Promote Through Content Marketing
Write blog posts, Medium articles, or even guest posts that tie into your book’s theme or genre. For nonfiction, this is especially powerful — you can link back to your book naturally.
Examples:
A memoir author writes a blog about the life lesson behind their story
A fantasy author blogs about world-building tips for aspiring writers
4. Ask for Reviews — Continuously
Don’t stop asking for reviews after launch week. More reviews = more trust. Try:
Adding a polite review request at the end of your book
Sending an email reminder to early buyers or subscribers
Asking reviewers from past books to check out your new one
5. Run Promotions Periodically
Use promotional pricing to spike sales and boost visibility. Services to help promote include:
BookBub Featured Deals (highly competitive, but powerful)
Bargain Booksy
Freebooksy
Book Cave
Rotate promos every few months to maintain momentum.
6. Keep Writing
The best long-term marketing strategy? Publish more books. A reader who loves one book is likely to buy more from you. Series and related books (even loosely connected) encourage binge reading.
Mention your other books in your back matter and keep readers in your ecosystem.
Final Tip
As covered in The Ultimate Guide to Self-Publishing in 2025: Step-by-Step for Beginners, successful authors treat marketing as an ongoing process. A strong launch gets you noticed — but consistent, smart post-launch marketing keeps your book alive and growing in the rankings.
J. Measuring Success and Scaling Up
Tracking your progress and knowing when and how to scale your efforts is crucial to long-term success as a self-published author. In The Ultimate Guide to Self-Publishing in 2025, understanding the metrics that matter helps you make informed decisions, optimize your strategies, and grow your author career sustainably.
1. Define Your Success Metrics
Before measuring success, clarify what success means for you. Common goals include:
Number of books sold
Revenue generated
Growth of your email list
Number of reviews and average rating
Engagement on social media
Ranking on platforms like Amazon
Tracking these metrics over time reveals what’s working.
2. Use Analytics Tools
Leverage tools designed for authors to gather data easily:
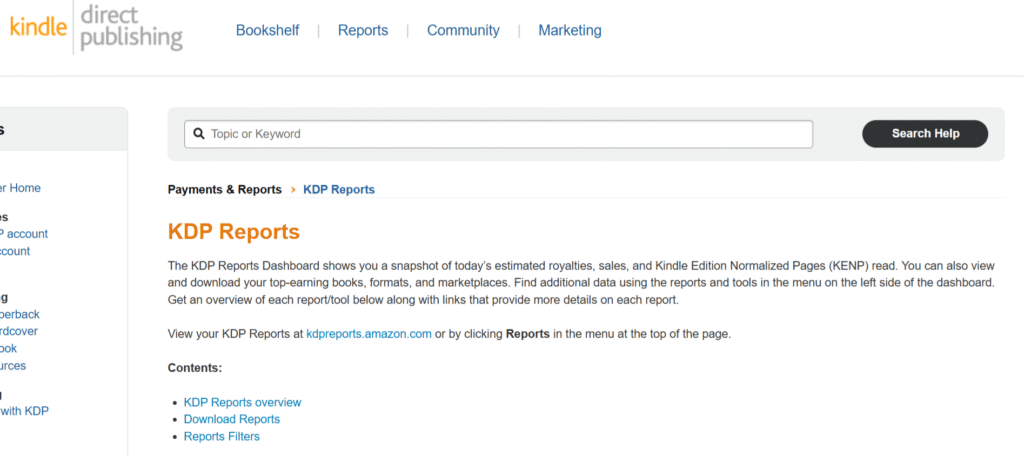
Amazon KDP Reports: Track sales, royalties, and trends by region and format.
Regularly reviewing these numbers helps you spot growth opportunities or warning signs early.
3. Experiment and Optimize
Use your data to test different strategies:
Try different book pricing and promotional tactics
A/B test cover designs or ad creatives
Vary your email marketing content or send times
Explore new marketing channels like podcasts or book clubs
Document your experiments and analyze results to invest your time and money wisely.
4. Scale Your Marketing and Production
Once you identify what works, scale up gradually:
Increase your advertising budget on winning campaigns
Hire professionals (editors, cover designers, marketers) to improve quality and save time
Plan multiple book releases per year to build a stronger catalog
Expand into audiobooks or translations to reach new audiences
Scaling thoughtfully prevents burnout and maximizes returns.
5. Set New Goals and Celebrate Wins
Regularly update your goals as you grow. Celebrate milestones to stay motivated, whether it’s hitting a sales target, earning your first 5-star review, or launching a new book.
As you follow these steps, remember that learning how to self-publish your book effectively can dramatically impact your success.
Remember, success in self-publishing is a marathon, not a sprint.
Final Thought
Measuring your progress and scaling up are critical steps in The Ultimate Guide to Self-Publishing in 2025: Step-by-Step for Beginners. By using data-driven decisions and strategic growth, you turn your passion for writing into a sustainable author career.
K. Bonus Section: Essential Tools & Resources for 2025
Pricing is a critical aspect of learning how to self-publish your book and should be researched carefully.
Here’s a curated list of essential tools recommended for every self-published author in 2025.
1. Writing and Editing Tools
Scrivener: A powerful writing software designed for authors to organize notes, drafts, and research in one place.
Grammarly: An AI-driven grammar and style checker to polish your manuscript and avoid common mistakes.
ProWritingAid: Advanced editing tool that improves style, tone, and clarity.
2. Cover Design and Formatting
Canva: User-friendly graphic design platform perfect for creating book covers and promotional images.
Vellum: Popular formatting software for beautiful eBooks and print-ready files (Mac only).
BookBrush: Tailored for authors to create stunning marketing images, 3D book mockups, and ads.
3. Publishing Platforms and Distribution
Amazon KDP: The go-to platform for publishing Kindle eBooks and paperbacks.
Draft2Digital: For wide distribution to multiple retailers besides Amazon.
IngramSpark: Best for professional-quality print books and broad bookstore distribution.
4. Marketing and Promotion
Mailchimp / Kit: Email marketing platforms to build and engage your reader list.
BookBub: Key promotional platform for paid book deals and visibility.
Facebook Ads Manager: Essential for running targeted ads on Facebook and Instagram.
Goodreads: Engage readers, run giveaways, and track book reviews.
Final Thoughts
Self-publishing in 2025 is more accessible, flexible, and rewarding than ever before. Whether you’re writing your first novel, a niche nonfiction guide, or a passion project, This Guide to Self-Publishing in 2025 has shown you the full path—from idea to publication and beyond.
By defining your audience, editing like a pro, designing a standout cover, crafting a launch plan, understanding pricing and royalties, and choosing the right tools, you’re not just publishing a book—you’re building your author brand and long-term creative career.
Success won’t come overnight, but with patience, persistence, and the strategies outlined here, you’ll be well on your way to publishing a professional-quality book that you’re proud to share with the world.
L. Call to Action
This guide blog is your launchpad—not your finish line. The real magic begins when you take that next step.
Start today. Stay consistent. Publish with confidence.
These resources are crucial for authors determined to learn how to self-publish your book and reach their audience effectively.
Each step is vital in your journey on how to self-publish your book, ensuring you make informed choices.
The right approach to pricing can significantly enhance your understanding of how to self-publish your book.
Finally, remember that ongoing education on how to self-publish your book is crucial for long-term success.
When comparing ConvertKit vs. Mailchimp for 2025, the difference is clear: ConvertKit focuses on simplicity, while Mailchimp packs in more features, which can lead to a steeper learning curve. In the realm of email marketing tools, understanding the strengths of each platform is essential when choosing between ConvertKit vs. Mailchimp. This ConvertKit vs. Mailchimp comparison will help you make an informed decision.
Table of Contents
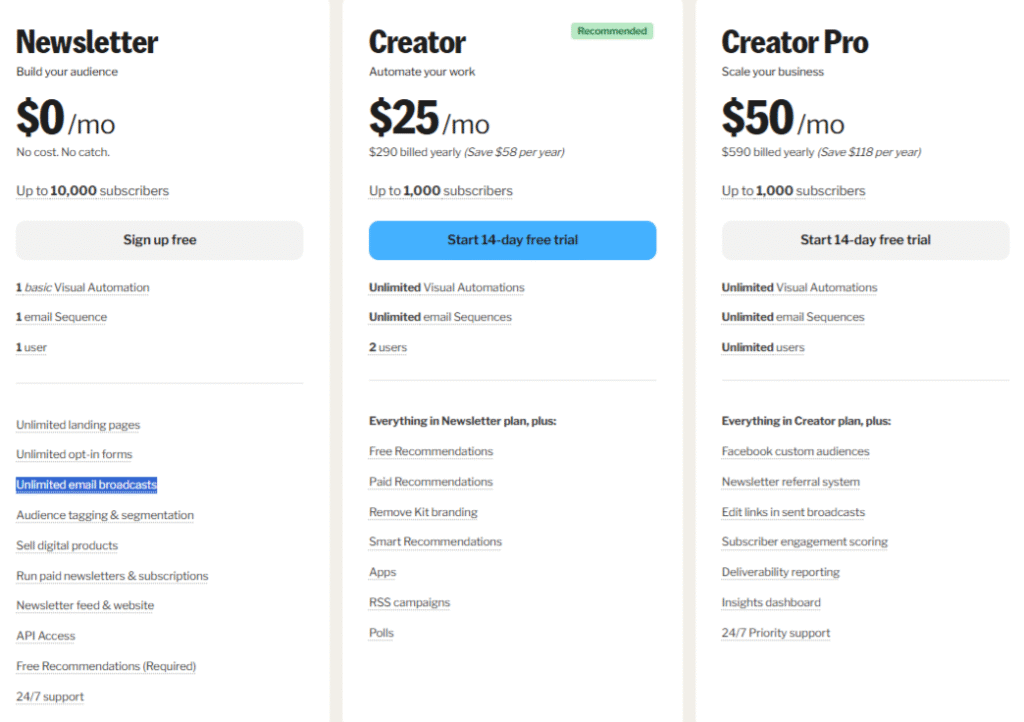
ConvertKit
For creators deciding on ConvertKit vs Mailchimp, both platforms offer unique advantages that cater to various marketing strategies.
ConvertKit is designed with creators in mind, and its clean, minimal interface reflects that. The dashboard is easy to navigate, with clearly labeled menus and an intuitive layout. Whether you’re building an email sequence, creating a form, or setting up automation, the platform keeps things straightforward. This simplicity is ideal for bloggers, authors, and solopreneurs who want to focus on content, not tech.
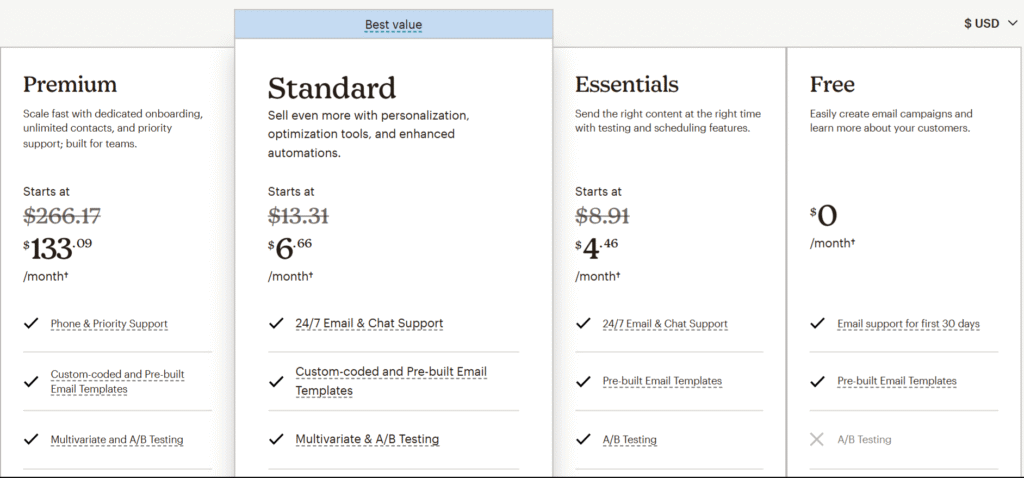
Mailchimp
Mailchimp, on the other hand, offers a more robust set of tools — but with added complexity. Its interface is visually polished and professional, but the variety of menus, tabs, and sub-settings can overwhelm new users. Features like campaign creation, segmentation, and reporting are powerful, but navigating through them requires a bit of a learning curve.
Ultimately, choosing between ConvertKit and Mailchimp comes down to what you value more: simplicity or a feature-rich experience.
Verdict
If you’re new to email marketing or prefer a platform that’s easy to use right out of the box, ConvertKit has the edge. It prioritizes usability over design complexity. Mailchimp offers more in terms of customization and features, but that power comes at the cost of simplicity.
Comparing ConvertKit vs. Mailchimp lets you see which platform aligns better with your marketing goals.
Email Campaign Creation
In the ConvertKit vs Mailchimp debate, it’s clear that user preferences will shape the best choice for each individual.
When it comes to email campaign creation, the tools you use can make a big difference in how quickly you get your message out and how professional it looks. In the battle of ConvertKit vs. Mailchimp, both platforms offer solid options — but with very different approaches.
Ultimately, the choice between ConvertKit vs. Mailchimp will depend on your specific needs and preferences.
ConvertKit
The tools you use in the ConvertKit vs. Mailchimp debate can greatly affect your marketing efforts.
ConvertKit keeps things simple. Its focus is on text-based emails that feel personal, like messages written directly to your audience. You won’t find dozens of flashy templates here, and that’s intentional — ConvertKit encourages engagement through plain, authentic communication. The editor is lightweight, distraction-free, and fast to use.
ConvertKit also makes it easy to add personalization, conditional content, and tags directly into your emails, which helps tailor your messages to different segments of your audience.
In the end, deciding between ConvertKit vs. Mailchimp can lead to better email marketing outcomes.
Mailchimp
Mailchimp offers a more traditional drag-and-drop email builder, with a large library of templates and design elements. It’s a better fit for users who want full control over visuals, branding, and layout. You can easily insert images, buttons, social icons, and more with just a few clicks.
While this flexibility is great for e-commerce or brand-heavy emails, the builder can sometimes feel a bit clunky or overwhelming for those who just want to write and send quickly.
For those wondering about the ConvertKit and Mailchimp functionality, it’s important to evaluate your requirements.
Verdict
In the ConvertKit vs. Mailchimp comparison, the best choice for email campaign creation depends on your goals.
Understanding the nuances of ConvertKit vs Mailchimp can lead to more effective email campaigns.
The differences in ConvertKit vs Mailchimp can significantly impact your email marketing results.
Choose ConvertKit if you prefer quick, simple, personal emails that get results.
Choose Mailchimp if you want polished, heavily designed emails and enjoy working with visual layouts.
Automation and Workflows
When it comes to email campaign creation, the tools you use can make a big difference in how quickly you get your message out and how professional it looks. In the battle of ConvertKit vs. Mailchimp, both platforms offer solid options — but with very different approaches.
ConvertKit
ConvertKit keeps things simple. Its focus is on text-based emails that feel personal, like messages written directly to your audience. You won’t find dozens of flashy templates here, and that’s intentional — ConvertKit encourages engagement through plain, authentic communication. The editor is lightweight, distraction-free, and fast to use.
ConvertKit also makes it easy to add personalization, conditional content, and tags directly into your emails, which helps tailor your messages to different segments of your audience.
Mailchimp
Mailchimp offers a more traditional drag-and-drop email builder, with a large library of templates and design elements. It’s a better fit for users who want full control over visuals, branding, and layout. You can easily insert images, buttons, social icons, and more with just a few clicks.
While this flexibility is great for e-commerce or brand-heavy emails, the builder can sometimes feel a bit clunky or overwhelming for those who just want to write and send quickly.
Verdict
In the ConvertKit vs. Mailchimp comparison, the best choice for email campaign creation depends on your goals.
Choose ConvertKit if you prefer quick, simple, personal emails that get results.
Choose Mailchimp if you want polished, heavily designed emails and enjoy working with visual layouts.
The choice of ConvertKit vs Mailchimp will affect how you connect with your audience.
Ultimately, weighing the factors in ConvertKit vs Mailchimp will help you select the best tool for your needs.
As you delve into ConvertKit vs Mailchimp, consider the specific features that will enhance your marketing efforts.
Landing Pages and Forms
Lead generation is a key part of any online marketing strategy. That’s why both ConvertKit and Mailchimp offer built-in tools for creating landing pages and forms. When comparing ConvertKit vs. Mailchimp, it’s important to look at how each platform helps you capture and convert visitors into subscribers.
Ultimately, the ConvertKit vs. Mailchimp analysis should be based on your marketing objectives.
ConvertKit
ConvertKit provides a straightforward and beginner-friendly way to build forms and landing pages. You can choose from a variety of templates, all of which are mobile-responsive and cleanly designed. While the customization options aren’t as advanced as some other tools, they’re more than enough for most creators and small businesses.
Forms can be embedded directly into your website, used as pop-ups, or shared as standalone pages. ConvertKit also lets you connect your forms to automation sequences and apply tags to subscribers as soon as they sign up — making it easy to personalize follow-up emails.
Mailchimp
This is a crucial moment in the ConvertKit vs. Mailchimp journey, as both platforms offer unique benefits.
To summarize the ConvertKit vs. Mailchimp features, it’s vital to consider your overall strategy.
Mailchimp offers more flexibility when it comes to design. Its landing page builder uses a drag-and-drop editor, similar to its email campaign builder. You can add images, text blocks, videos, buttons, and more, which gives you more control over branding and layout.
Mailchimp also supports embedded and pop-up forms that integrate with your website. Plus, it includes options for setting up thank-you pages and redirect URLs after a form is submitted, which is great for customizing the user experience.
Verdict
As you analyze ConvertKit vs. Mailchimp, think about how each platform fits your workflow.
When it comes to landing pages and forms, the right choice in ConvertKit vs. Mailchimp depends on your priorities:
Choose ConvertKit if you want a clean, fast setup with forms that integrate tightly with automations and tagging.
Choose Mailchimp if you want more creative control and advanced design features in your landing pages.
Both platforms make it easy to start collecting leads — but ConvertKit is more streamlined for creators, while Mailchimp is more robust for marketers who want design flexibility.
Segmentation and Tagging
Effective email marketing isn’t just about sending messages — it’s about sending the right message to the right person. This is where segmentation and tagging come into play. When comparing ConvertKit vs. Mailchimp, both platforms offer ways to organize your audience, but their approaches are very different.
ConvertKit
ConvertKit uses a tag-based system to manage subscribers. Instead of organizing people into separate lists, ConvertKit treats your audience as one unified list and allows you to add tags based on behavior, interests, or activity. For example, you can tag subscribers who downloaded a freebie, clicked a specific link, or made a purchase.
This system is flexible, easy to scale, and avoids duplication — which means better targeting and lower costs. You can also use segments (a combination of tags, custom fields, and forms) to create dynamic groups for specific campaigns.
Mailchimp
Mailchimp takes a more traditional approach with lists (called “audiences”), tags, segments, and groups. While this offers more layers of organization, it can be confusing for beginners. A major downside is that if the same person exists on multiple lists, Mailchimp counts them as separate contacts — which could increase your monthly cost.
Tags and segments can still be used effectively in Mailchimp, but managing multiple lists often requires more manual oversight and setup compared to ConvertKit’s streamlined tagging system.
Verdict
In the ConvertKit vs. Mailchimp comparison, ConvertKit wins for ease of segmentation. Its single list with flexible tagging system makes managing subscribers simple and scalable — especially for creators.
Mailchimp’s segmentation tools are powerful but more complex and can lead to list duplication and higher costs if not managed carefully.
Integrations and Third-Party Apps
One of the most important factors when choosing an email marketing platform is how well it integrates with the other tools you use. In the ConvertKit vs. Mailchimp comparison, both platforms offer a wide range of integrations — but they cater to different user needs and priorities.
ConvertKit
ConvertKit integrates with over 100 tools, with a strong emphasis on creator-focused apps. This includes integrations with platforms like:
WordPress
Shopify
Teachable
Gumroad
Stripe
Patreon
It also supports Zapier, which allows you to connect with thousands of other apps. The integrations are easy to set up and typically geared toward content creators, bloggers, and online course sellers. While it may not have as wide a range as Mailchimp, ConvertKit makes up for it with deep, seamless integrations in its target niche.
Mailchimp
Mailchimp excels in this area, with hundreds of integrations across various industries. Some popular integrations include:
Shopify
WooCommerce
Squarespace
Salesforce
Eventbrite
Facebook and Instagram Ads
Canva
Mailchimp also connects with Zapier and custom APIs, giving advanced users a lot of flexibility. Its deep e-commerce integrations, especially for tracking customer behavior and syncing product data, are a major advantage for online retailers.
Verdict
In the ConvertKit vs. Mailchimp match-up, your choice comes down to your business model:
Choose ConvertKit if you’re a creator looking for smooth, lightweight integrations with course platforms, payment tools, or content management systems.
Choose Mailchimp if you’re running an online store or need broad support for advanced CRM, e-commerce, and advertising tools.
Both platforms offer Zapier support, so even if an integration isn’t native, you can likely connect the tools you need.
Analytics and Reporting
Understanding how your emails perform is essential to growing your list, increasing engagement, and improving conversions. In this section of the ConvertKit vs. Mailchimp comparison, we look at how each platform handles analytics and reporting — and which one gives you better insights to make data-driven decisions.
ConvertKit
ConvertKit offers simple, easy-to-read analytics that focus on the basics: open rates, click rates, unsubscribes, and subscriber growth over time. You can also track the performance of individual email sequences, automation funnels, and landing pages.
While the reporting dashboard is clean and useful, it lacks more advanced metrics like geo-tracking, social performance, or e-commerce conversions. That said, it covers everything most creators and small businesses need without overwhelming you with data.
Mailchimp
Mailchimp shines when it comes to in-depth reporting. In addition to core metrics (opens, clicks, bounces, unsubscribes), Mailchimp provides:
Click maps (visual heatmaps of link engagement)
Geolocation data
Social media performance
E-commerce tracking (when integrated with platforms like Shopify or WooCommerce)
Comparative benchmarks against industry averages
These advanced features are particularly useful for marketers running large campaigns, stores, or multiple audience segments.
Verdict
When comparing ConvertKit vs. Mailchimp for analytics, it’s a question of simplicity vs. depth:
ConvertKit is best if you want clean, no-fuss reporting that shows you what matters most.
Mailchimp is ideal if you need detailed, multi-layered analytics, especially for e-commerce and larger-scale campaigns.
If your focus is straightforward content and list building, ConvertKit’s reports will likely be enough. For data-heavy marketing strategies, Mailchimp offers more tools.
Deliverability
No matter how great your email content is, it won’t matter if it never reaches your subscribers’ inboxes. That’s why deliverability is a critical factor in the ConvertKit vs. Mailchimp comparison. Let’s look at how each platform performs when it comes to getting your emails delivered successfully.
ConvertKit
ConvertKit is widely known for its strong deliverability. It uses a tag-based system and single opt-in by default, which means lists are generally cleaner and engagement rates are higher. The platform prioritizes sender reputation and encourages users to send valuable, targeted content — all of which improve inbox placement.
In independent deliverability tests, ConvertKit consistently ranks high, with inbox placement rates typically in the mid-to-high 90% range. It also provides features like domain authentication and subscriber engagement tracking to help maintain a good reputation over time.
Mailchimp
Mailchimp also has excellent deliverability, thanks to its large infrastructure, established sender reputation, and strict anti-spam policies. It offers tools like double opt-in, domain authentication, and spam score analysis to help users stay compliant and maintain healthy lists.
Mailchimp’s segmentation and automation tools also allow you to send highly relevant messages, which boosts engagement and inbox placement. Like ConvertKit, it usually reports deliverability rates around 95% or higher, but the actual results will depend on your content, audience, and sending habits.
Verdict
In the ConvertKit vs. Mailchimp debate on deliverability, it’s a close match:
ConvertKit is slightly more creator-focused, with clean lists and high engagement that naturally improve deliverability.
Mailchimp has robust systems in place, making it a strong choice for businesses with larger, more complex email lists.
Both platforms take deliverability seriously, so your emails are in good hands — as long as you follow best practices.
Pricing and Plans
Pricing can be a deciding factor when choosing an email marketing platform. Both ConvertKit and Mailchimp offer free plans and scalable paid tiers — but the features you get at each level vary quite a bit. In this ConvertKit vs. Mailchimp comparison, we’ll break down how their pricing models differ and what kind of value you can expect.
ConvertKit
ConvertKit offers a Free Plan for up to 10,000 subscribers. It includes basic email broadcasts, forms, and landing pages — but automation and integrations are limited. To unlock advanced features, you’ll need to upgrade.
Paid plans include:
Creator – Starts at $25/month (for up to 1,000 subscribers). Includes automated funnels, integrations, and email sequences.
Creator Pro – Starts at $50/month (for up to 1,000 subscribers). Adds advanced reporting, subscriber scoring, and Facebook custom audiences.
ConvertKit’s pricing is straightforward and scales with your subscriber count. What makes it attractive is that all features are included in paid tiers — there are no surprises or paywalls for core tools.
Mailchimp
Mailchimp also offers a Free Plan, covering up to 500 contacts and 1,000 email sends per month. It includes Email support for first 30 days, and Pre-built Email Templates. However, features like A/B testing, custom branding, and advanced reporting are locked behind paid tiers.
Standard – Starts at $6.66/month (for 500 contacts). Includes 24/7 Email, Custom-coded and Multivariate & A/B Testing, Enhanced Automated Customer Journeys, Personalized Onboarding, Predictive Segmentationtooltip, and behavioral targeting.
Premium – Starts at $133.09/month (for 500 contacts). Scale fast with dedicated onboarding, unlimited contacts, and priority support; built for teams. Includes Phone & Priority Support, Custom-coded and Multivariate & A/B Testing, Enhanced Automated Customer Journeys, Dedicated Personalized Onboarding, Predictive Segmentationtooltip, and behavioral targeting.
Mailchimp’s pricing can become expensive quickly — especially since it charges per contact across lists, which can lead to duplication and higher fees.
Verdict
When comparing ConvertKit vs. Mailchimp on pricing:
ConvertKit is ideal for creators who want transparent pricing and access to all core features once they upgrade.
Mailchimp offers more granular pricing tiers and a lower starting cost, but you may hit limits or need expensive upgrades as your needs grow.
If simplicity, fair pricing, and unlimited email sending are important, ConvertKit is the better long-term value. If you need a free option with basic features or want more audience-based segmentation, Mailchimp might work — just watch for hidden costs.
Support and Documentation
When you’re managing email campaigns, having access to helpful support and clear documentation can save you a lot of time and frustration. In this ConvertKit vs. Mailchimp comparison, both platforms offer customer support and knowledge bases — but their levels of service differ depending on your plan.
ConvertKit
ConvertKit is known for its strong customer support, especially for creators and small business owners who may not have a technical background. Support is available via:
Email (all plans)
Live chat (paid plans)
Access to a comprehensive knowledge base
Weekly live training and video tutorials
Community support in their creator community forum
What sets ConvertKit apart is the personalized help users often receive. Their support team is creator-focused and usually responds quickly with actionable solutions. The documentation is well-organized, with guides that walk you step-by-step through setup, automation, tagging, and integrations.
Mailchimp
Mailchimp offers a wider range of support options, but access depends on your plan:
Email support (Essentials and above)
Live chat (Essentials and above)
Phone support (Premium only)
Extensive knowledge base and how-to guides
AI-powered chatbot for quick answers
Forums and Mailchimp Academy for learning
Mailchimp’s help articles are detailed and searchable, but because it serves such a wide range of users, the documentation can sometimes feel overwhelming. If you’re on the free plan, support is limited to the self-service resources and chatbot.
Verdict
In the ConvertKit vs. Mailchimp showdown for support and documentation:
ConvertKit shines with personalized support and creator-focused content, making it a strong choice for solo entrepreneurs and beginners.
Mailchimp has robust support for paid users and more advanced resources, but free plan users may feel limited.
If responsive support and beginner-friendly documentation matter to you, ConvertKit offers a more supportive environment. For users on higher-tier plans who need advanced help, Mailchimp delivers more variety.
Target Audience Fit
Choosing the right email marketing platform isn’t just about features — it’s also about how well the tool fits your specific needs and goals. In this section of ConvertKit vs. Mailchimp, we’ll look at who each platform is really built for and which types of users will get the most value.
ConvertKit
ConvertKit was built specifically for creators — think bloggers, podcasters, YouTubers, coaches, course creators, and solo entrepreneurs. Its streamlined interface, focus on audience tagging, and creator-centric features (like product sales and subscriber scoring) are tailored to individuals and small teams growing a personal brand.
If you value simplicity, automation, and tools that help you engage a loyal audience without needing enterprise-level features, ConvertKit is a great fit.
Mailchimp
Mailchimp serves a broader and more traditional business audience. It’s used by small to mid-sized businesses, e-commerce brands, marketing teams, and startups. Its feature set includes advanced segmentation, e-commerce tracking, landing pages, advertising tools, and more.
If you run a store, manage multiple customer segments, or want to run email alongside ads and CRM functions, Mailchimp’s all-in-one approach is appealing.
Verdict
In the ConvertKit vs. Mailchimp comparison for target audience fit:
ConvertKit is best for individual creators and solopreneurs who want to focus on growing an audience and selling digital products.
Mailchimp is a better choice for businesses and teams that need a wider set of marketing tools and integrations under one roof.
Ultimately, it depends on whether you’re building a personal brand or running a business operation — each tool fits a different kind of growth path.
Pros and Cons Summary Table
To wrap up this ConvertKit vs. Mailchimp comparison, here’s a quick summary of the key advantages and disadvantages of each platform. This table can help you quickly identify which tool aligns best with your needs.
Feature
ConvertKit – Pros
ConvertKit – Cons
Mailchimp – Pros
Mailchimp – Cons
Ease of Use
Clean, simple interface built for creators
Lacks some advanced layout tools
User-friendly with drag-and-drop editor
Interface can be cluttered for new users
Email Campaigns
Great for plain-text, personal-style emails
Limited template variety
Robust design options and pre-made templates
Templates can be restrictive in customization
Segmentation & Tags
Powerful tagging system for behavioral targeting
Learning curve for beginners
Strong audience management features
Contact duplication can inflate costs
Integrations
Seamless with creator tools like Teachable, Stripe, Gumroad
Fewer business-level integrations than Mailchimp
Broad integration with e-commerce, CRMs, and ad platforms
May require upgrades to unlock certain integrations
Analytics
Simple, focused metrics for creators
Lacks advanced reporting tools
Deep analytics, heat maps, social, and e-commerce tracking
Can be overwhelming for casual users
Deliverability
Also, high deliverability and spam protection tools
Fewer advanced sending controls
Low-cost entry plans are available
Free plan lacks deeper configuration
Pricing
Transparent pricing, generous features on lower plans
Slightly higher starting cost than Mailchimp
User-friendly with a drag-and-drop editor
Advanced features get expensive quickly
Support
Fast, friendly support with a creator focus
Live chat is not available on the free plan
Comprehensive support for paid tiers
Limited support on the free plan
Best For
Solo creators, coaches, bloggers
Not ideal for large teams or complex businesses
Small businesses, online stores, marketing teams
High deliverability with a strong sender reputation focus
Final Verdict: ConvertKit vs. Mailchimp
So, when it comes to ConvertKit vs. Mailchimp, which email marketing platform should you choose?
The answer depends entirely on your goals, business type, and level of experience.
Choose ConvertKit if:
You’re a creator, blogger, coach, or online educator
You want simple automation, a clean user experience, and tools designed for audience growth
You value clean, intuitive workflows and high deliverability
You prefer transparent pricing without hidden upgrade costs
ConvertKit is purpose-built for individuals growing a personal brand or selling digital products. It’s lightweight but powerful — perfect for creators who want to build authentic relationships with their audience.
Choose Mailchimp if:
You’re a small business, e-commerce brand, or marketing team
You need robust templates, advanced segmentation, and multi-channel marketing tools
You’re looking for an all-in-one marketing platform with landing pages, CRM, ads, and social tools
You want a lower-cost entry point or are already using Mailchimp’s ecosystem
Mailchimp is ideal for those who want a broad feature set and have more complex marketing needs. It’s especially powerful for businesses selling physical products or managing multiple customer segments.
Bottom Line
In the ConvertKit vs. Mailchimp debate, ConvertKit wins for creators who want simplicity and focus, while Mailchimp wins for businesses that need marketing depth and customization.
Your best option depends on what you’re trying to achieve:
Want to build a loyal audience and monetize your content? Go with ConvertKit.
Running a product-based business or need more advanced marketing tools? Consider Mailchimp.
No matter which you choose, both platforms are capable of helping you grow your email list and engage your audience effectively.
FAQs
Here are answers to some of the most commonly asked questions about ConvertKit vs. Mailchimp to help you make the best decision for your email marketing needs.
1. Which is better for beginners, ConvertKit or Mailchimp?
ConvertKit is often the better choice for beginners, especially creators who want a clean and simple interface. Mailchimp has more features, but it can feel overwhelming for new users due to its complexity.
2. Can I switch from Mailchimp to ConvertKit (or vice versa)?
Yes, both platforms allow you to import and export your subscriber lists. ConvertKit even provides concierge migration services for free on certain plans, making the transition smoother for new users.
3. Does ConvertKit or Mailchimp offer better automation?
ConvertKit is stronger in automation for creators with its visual automations and simple workflows. Mailchimp has more advanced options, but they may require a higher-tier plan and can be harder to set up.
4. Which tool is better for e-commerce businesses?
Mailchimp is generally better for e-commerce. It integrates well with platforms like Shopify and WooCommerce, and it offers features like product recommendations, abandoned cart emails, and purchase behavior tracking.
5. Are there any hidden costs in Mailchimp?
Yes, Mailchimp can get expensive quickly. It charges per contact (including duplicates across lists) and restricts some features to higher-tier plans. ConvertKit has more transparent pricing with all features included in paid tiers.
6. Can I use ConvertKit or Mailchimp for free?
Yes. Both offer free plans:
ConvertKit: Free for up to 10,000 subscribers (limited features)
Mailchimp: Free for up to 500 contacts and 1,000 email sends/month
However, to access advanced features, you’ll need to upgrade.
7. Which platform has better deliverability?
Both platforms have strong deliverability rates, but ConvertKit places a higher focus on maintaining sender reputation, making it slightly more consistent for creators who rely on personal engagement.
8. Is it easy to integrate ConvertKit or Mailchimp with other tools?
Yes. Both platforms support integrations with popular tools. Mailchimp offers broader integration for CRMs and e-commerce platforms, while ConvertKit focuses more on tools used by creators, like Teachable, Stripe, and WordPress.
9. Which platform is better for affiliate marketers?
ConvertKit is more flexible for affiliate marketing, as long as the content aligns with its terms of service. Mailchimp has stricter policies around affiliate content and may suspend accounts deemed too promotional.
10. What’s the final recommendation?
Use ConvertKit if you’re a content creator, coach, or solo entrepreneur. Choose Mailchimp if you’re running a small business, e-commerce store, or need a full-featured marketing suite.